

Unattended installation of SQL Server
It is a third post on series related to installation and configuration of SQL Server installations.
This series is for professionals who start their journey with SQL Server administration and also for those who want to extend and structure their knowledge on SQL Server administration.
Preparations
We are starting with the following assumptions:
- All steps described in this first blog post has been configured
- ISO file with SQL Server binaries and Cumulative Update files are available – steps how to download it are described in previous blog post
- There is a connection between Windows server and domain controller
- No issues with connectivity with Active Directory domain (no AD-related errors in System Event Log)
Use case
Imagine a situation when you are tasked to install a dozen SQL Server instances. Using an approach described in previous blog post installation can take a significant amount of resources and time, also there is a probability of errors due to typos (e.g. in directory paths, etc.)
There are two options that can be used for the installation:
- Using ConfigurationFile.ini
- Using command line parameters to setup.exe file
Below there are step-by-step instructions on how to install SQL Server using both options.
Installation of SQL Server using ConfigurationFile.ini
In the previous post on one of the last configuration screen (Ready to Install), I have marked the path to ConfigurationFile.ini generated automatically by the installer. This file contains all of the settings that you have selected during installation using GUI.
Let’s go to C:Program FilesMicrosoft SQL Server140Setup BootstrapLog<date_time> location
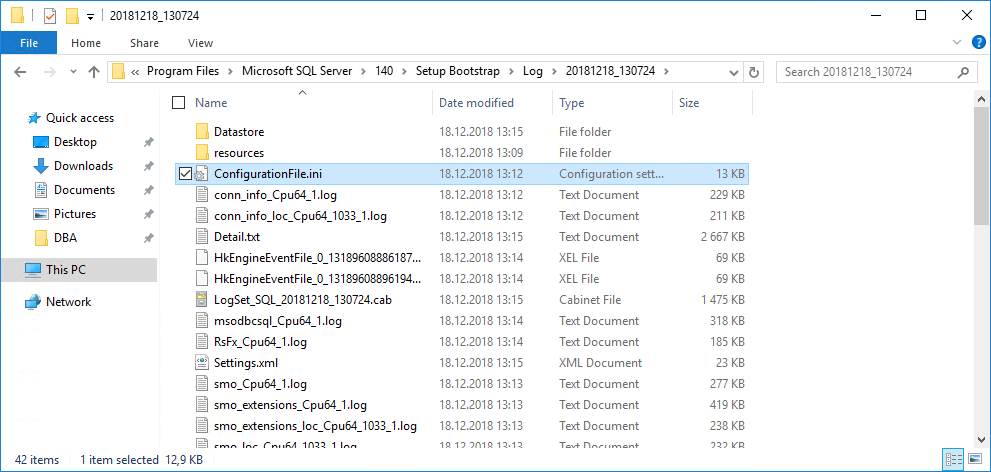
Let’s have a look at the ConfigurationFile.ini file:
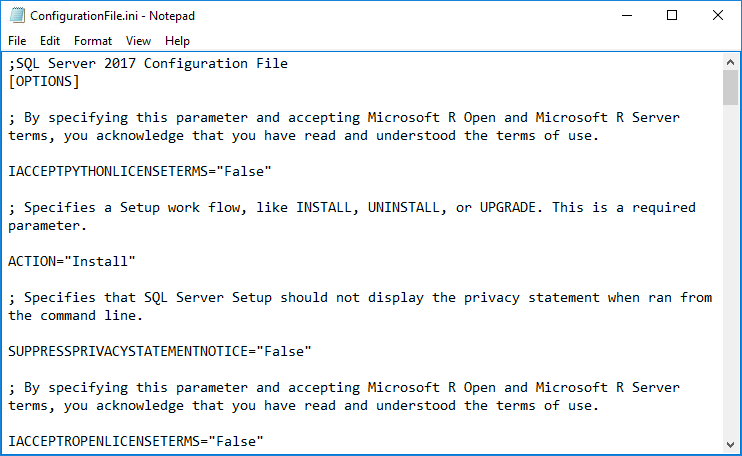
Inside file we have several sections that are interesting for us:
- QUIET – determines if a user interface is disabled
- QUIETSIMPLE – Setup will display progress only, without any user interaction
- UIMODE – defines how User Interface will be displayed, requires that QUIETSIMPLE is set to True
- UpdateEnabled – allows installation of updates
- UpdateSource – specifies the location of updates
- INDICATEPROGRESS – specifies that the detailed log will be shown on the console
Having all these parameters we can start installing SQL Server using different modes
Manual installation with populated configuration settings
In this sections following parameters will be used:
- QUIET=”False”
- QUIETSIMPLE=”False”
- UIMODE=”Normal”
- UpdateEnabled=”False”
- UpdateSource=”MU”
- INDICATEPROGRESS=”False”
To start installation run command line and provide the following command:
E:setup.exe /ConfigurationFile=D:DBAConfigurationFile.ini
where E: is the path to SQL Server binaries.
After running above command, GUI installation with start with values already provided
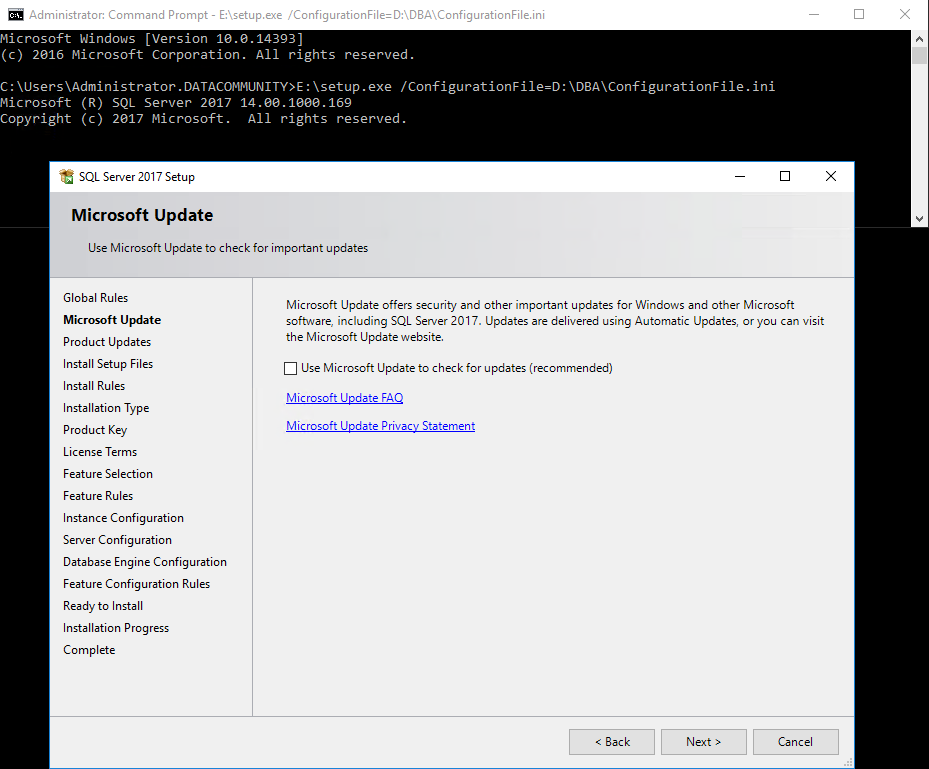
All of the configuration values are taken from ConfigruationFile.ini.
Manual installation with populated configuration settings using latest Cumulative Update located in D:DBAUpdates directory
In this sections following parameters will be used:
- QUIET=”False”
- QUIETSIMPLE=”False”
- UIMODE=”Normal”
- UpdateEnabled=”True”
- UpdateSource=”D:DBAUpdates”
- INDICATEPROGRESS=”False”
To start installation run command line and provide the following command:
E:setup.exe /ConfigurationFile=D:DBAConfigurationFile.ini
where E: is the path to SQL Server binaries
After running above command, GUI installation with start with values already provided.
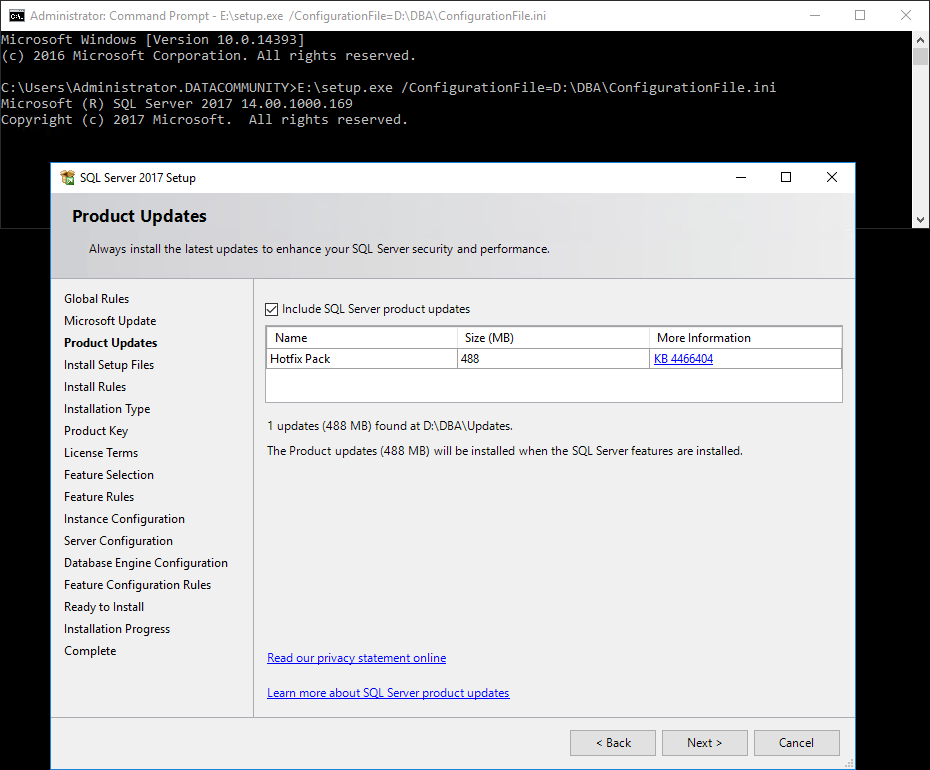
All of the configuration values are taken from ConfigruationFile.ini.
Automated installation using latest Cumulative Update from D:DBAUpdates directory with progress indication
In this sections following parameters will be used:
- QUIET=”False”
- QUIETSIMPLE=”True”
- ;UIMODE=”Normal” <- commented out
- UpdateEnabled=”True”
- UpdateSource=”D:DBAUpdates”
- INDICATEPROGRESS=”False”
To start installation run command line and provide the following command:
E:setup.exe /ConfigurationFile=D:DBAConfigurationFile.ini /IAcceptSQLServerLicenseTerms
where E: is the path to SQL Server binaries
After running above command, the installation will start using values from the configuration file.
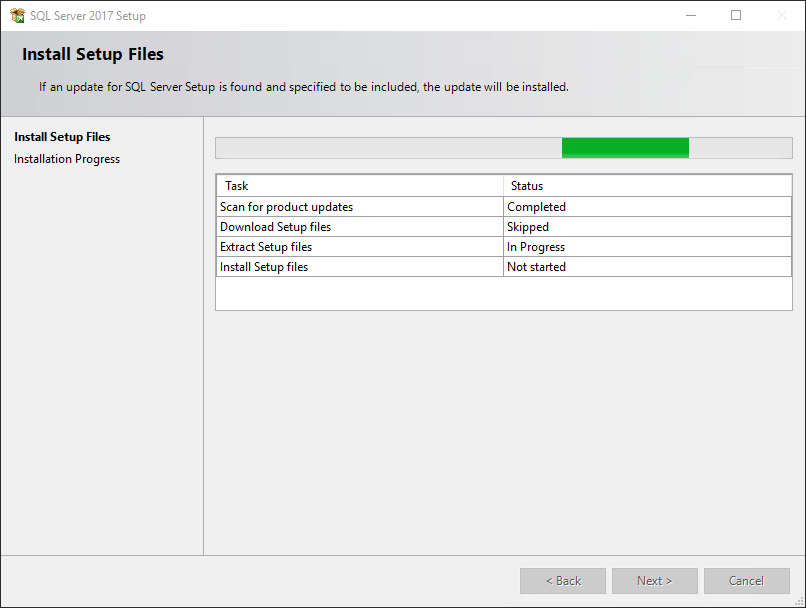
After setting up all installation file, installation of SQL Server itself will start.
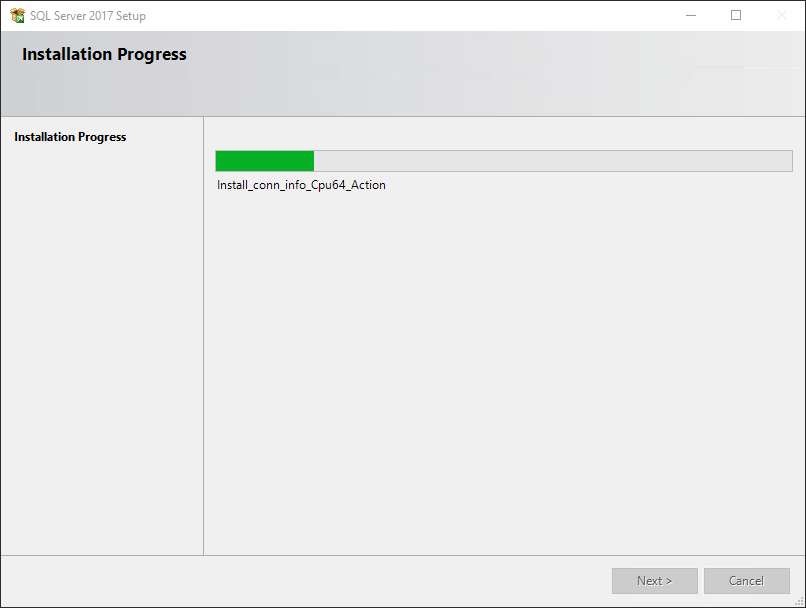
After completing this step SQL Server is ready for use.
Fully automated installation using latest Cumulative Update from D:DBAUpdates directory
In this sections following parameters will be used:
- QUIET=”True”
- QUIETSIMPLE=”False”
- ;UIMODE=”Normal” <- commented out
- UpdateEnabled=”True”
- UpdateSource=”D:DBAUpdates”
- INDICATEPROGRESS=”True”
To start installation run command line and provide the following command:
E:setup.exe /ConfigurationFile=D:DBAConfigurationFile.ini /IAcceptSQLServerLicenseTerms
Where E: is the path to SQL Server binaries

There will be no GUI window displayed, the only information is shown on the console. Once all steps complete SQL Server is ready for use.
Installation of SQL Server using a command line
An alternative option is to use command line parameters to install SQL Server. In the following example, I am going to install SQL Server with indication of installation.
For the installation following parameters are provided:
- QS
- ACTION=Install
- FEATURES=SQLENGINE
- ENU
- UpdateEnabled=1
- UpdateSource=”D:DBAUpdates”
- INSTANCEDIR=”D:MSSQLServer”
- INSTANCENAME=MSSQLSERVER
- SQLSVCACCOUNT=”DATACOMMUNITYSQLServerEngine$”
- SQLSYSADMINACCOUNTS=”DATACOMMUNITYadministrator”
- AGTSVCACCOUNT=”DATACOMMUNITYSQLServerAgent$”
- AGTSVCSTARTUPTYPE=”Automatic”
- BROWSERSVCSTARTUPTYPE=”Disabled”
- INSTALLSQLDATADIR=”D:MSSQLServer”
- SQLBACKUPDIR=”D:SQLBackup”
- SQLCOLLATION=”SQL_Latin1_General_CP1_CI_AS”
- SQLSVCSTARTUPTYPE=”Automatic”
- SQLTEMPDBDIR=”D:SQLTempDB01″ “D:SQLTempDB02” “D:SQLTempDB03” “D:SQLTempDB04”
- SQLTEMPDBLOGDIR=”D:SQLTLog”
- SQLUSERDBDIR=”D:SQLData00″
- SQLUSERDBLOGDIR=”D:SQLTLog”
- SQLTEMPDBFILECOUNT=4
- IACCEPTSQLSERVERLICENSETERMS
Having all parameters together, command will look like as follows:
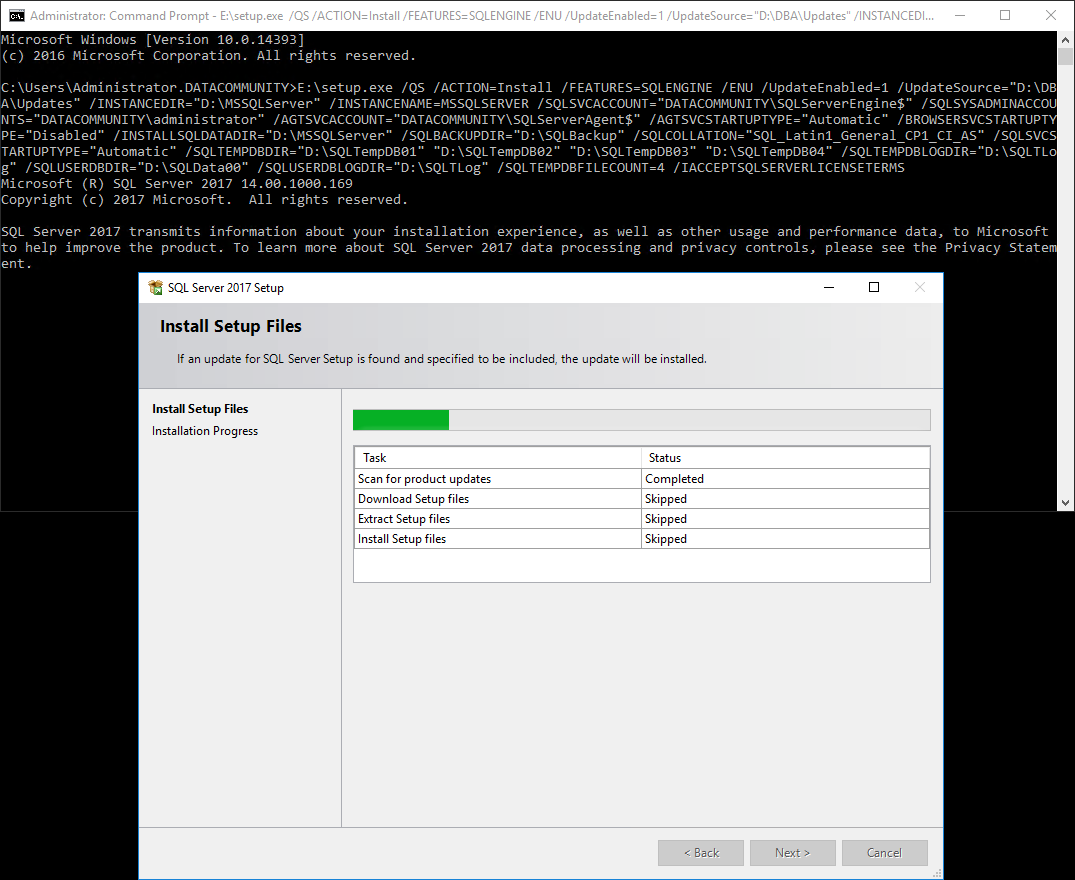
E:setup.exe /QS /ACTION=Install /FEATURES=SQLENGINE /ENU /UpdateEnabled=1 /UpdateSource="D:DBAUpdates" /INSTANCEDIR="D:MSSQLServer" /INSTANCENAME=MSSQLSERVER /SQLSVCACCOUNT="DATACOMMUNITYSQLServerEngine$" /SQLSYSADMINACCOUNTS="DATACOMMUNITYadministrator" /AGTSVCACCOUNT="DATACOMMUNITYSQLServerAgent$" /AGTSVCSTARTUPTYPE="Automatic" /BROWSERSVCSTARTUPTYPE="Disabled" /INSTALLSQLDATADIR="D:MSSQLServer" /SQLBACKUPDIR="D:SQLBackup" /SQLCOLLATION="SQL_Latin1_General_CP1_CI_AS" /SQLSVCSTARTUPTYPE="Automatic" /SQLTEMPDBDIR="D:SQLTempDB01" "D:SQLTempDB02" "D:SQLTempDB03" "D:SQLTempDB04" /SQLTEMPDBLOGDIR="D:SQLTLog" /SQLUSERDBDIR="D:SQLData00" /SQLUSERDBLOGDIR="D:SQLTLog" /SQLTEMPDBFILECOUNT=4 /IACCEPTSQLSERVERLICENSETERMS
After running above command, installation will start
After installation, the progress window will be closed and SQL Server is ready for install.
This option my preferred way to install SQL Server. If you are interested in PowerShell script for unattended SQL Server installation based on provided parameters, visit my GitHub repository.
Summary
In complex environments installation of SQL Server instances can be a tedious task that can be easily automated. This blog post extensively describes methods of possible installation.
Also, smaller environments can benefit from this approach by minimizing the time needed for installation, keeping quality on the same level. Every time when you want to use unattended installation SQL Server, check this blog post for all steps.
Links
More information about steps described above can be found on the following sites:
Install SQL Server using a configuration file
Install SQL Server from the Command Prompt
https://github.com/michalsadowski/SQLBuild
About author

You might also like

Installation of Docker Desktop for Windows
It is the first post on series related to installation and configuration of Docker containers on the Microsoft Windows platform. This series is for professionals who start their journey with

Installation SQL Server client tools
It is the fourth post on series related to installation and configuration of SQL Server client tools required. This series is for professionals who start their journey with SQL Server

Configuration of SQL Server instance
It is the fifth post on series related to installation and configuration of SQL Server client tools required. This series is for professionals who start their journey with SQL Server


6 Comments
Nik
February 28, 20:51Hi, This simply does not work. It always failed with the error:
The Windows account “MyDomain\My Account” does not exist and cannot be provisioned as a SQL Server system administrator. The machine is not joined to the domain. Any idea how to bypass these with SQL Server Developers install command line and using Configuration.ini?
Michal Sadowski
February 28, 21:05Hi Nik,
If you are installing SQL Server on the computer not joined to the domain, provide “administrators” or another local group as a parameter to SQLSYSADMINACCOUNTS option.
Best regards,
Michał
tempo
March 02, 13:06This excellent website certainly has all the info I wanted concerning this subject and didn’t know who to ask.
Bernhard
April 15, 10:05Hello Michael,
your article helped me a lot. I had to move 20 Instances on a single server with a very small time slot.
Thank you!
Michal Sadowski
April 15, 13:25Hello Bernhard,
Thank you for the kind words!
Best regards,
Michal
dimbulbz
November 01, 22:09Is it possible to upgrade SQL (say from 2012 to 2022) server using a batch process? We have many instances that need to be upgraded and a small window to accomplish it.