
Azure Databricks – create new workspace and cluster
In this post, I will quickly show you how to create a new Databricks in Azure portal, create our first cluster and how to start work with it. This post is for very beginners. The goal is to build that knowledge and have a starting point for subsequent posts which will describe some specific issues.
Azure Databricks
Azure Databricks is a fully-managed version of the open-source Apache Spark analytics and data processing engine. Azure Databricks is an enterprise-grade and secure cloud-based big data and machine learning platform. Databricks provides a notebook-oriented Apache Spark as-a-service workspace environment, making it easy to manage clusters and explore data interactively.
Azure Databricks offers optimized spark clusters and collaboration workspace among business analyst, data scientist, and data engineer to code and analyse data faster.
Create Databricks in Azure portal
Let’s start with the Azure portal. Firstly, find “Azure Databricks” on the menu located on the left-hand side. If you can’t see it – go to “All services” and input “Databricks” in the searching field.

Azure Databricks Service in Azure Portal
Then, click the “Add” button, which gives you the opportunity to create a new Databricks service.
Put a required name for your workspace, select existing Subscription, Resource group and Location:
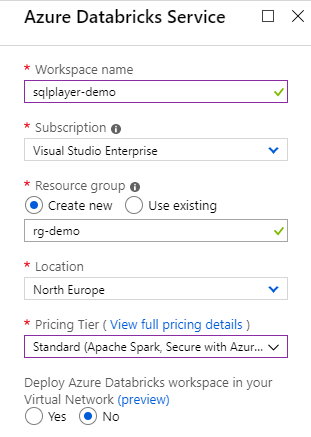
New Azure Databricks Service
Select one option from available in Pricing Tier:
- Standard (Apache Spark, Secure with Azure AD)
- Premium (+ Role-based access control)
- Trial (Premium – 14 Days Free DBUs)
Right above the list – there is a link to full pricing details.
Premium Tier is giving you more control about who has access to what.
For our demo purposes – do select “Standard” and click “Create” button on the bottom. Creating a new cluster takes a few minutes and afterwards, you’ll see newly-created service on the list:
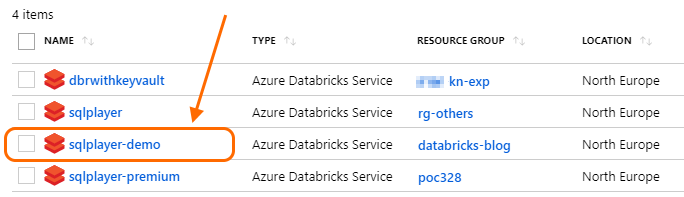
List of Azure Databricks instances
Simply, click on the service name to get basic information about the Databricks Workspace. Click “Launch Workspace” and you’ll go out of Azure Portal to the new tab in your browser to start working with Databricks.

Azure Databricks Service Page
First glance at Azure Databricks
The browser opens a URL address similar to the following:
https://northeurope.azuredatabricks.net/?o=4763555456479339#
As you can see – there is a region as a sub-domain and a unique ID of Databricks instance in the URL.
The landing page of Azure Databricks is quite informative and useful:
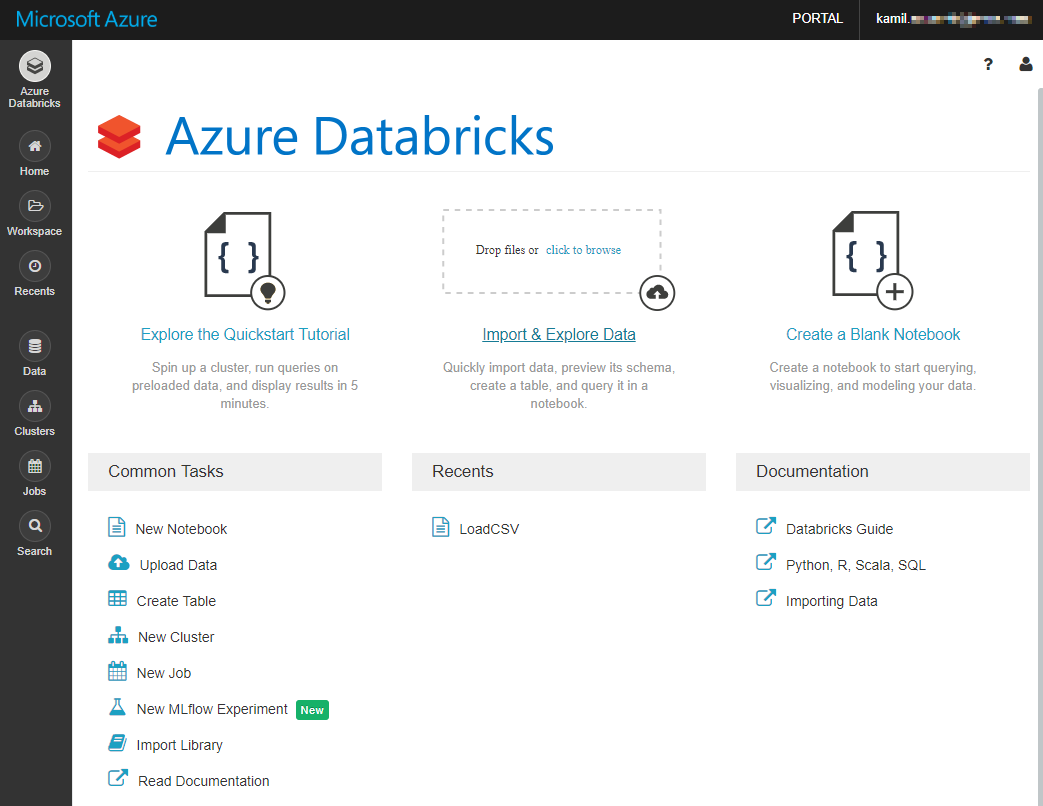
Azure Databricks Landing Page
We’re going to focus only at a few sections now, located on the left:
- Azure Databricks – landing page. A good exit point to various features.
- Workspace – here you will create notebooks in your own or shared folder.
- Clusters – list of defined clusters. A cluster is a computing unit that can execute our notebooks.
- Jobs – create and schedule jobs in order to run the selected notebook at a specified time utilise require cluster.
In this post, we will focus briefly at Workspace and Clusters.
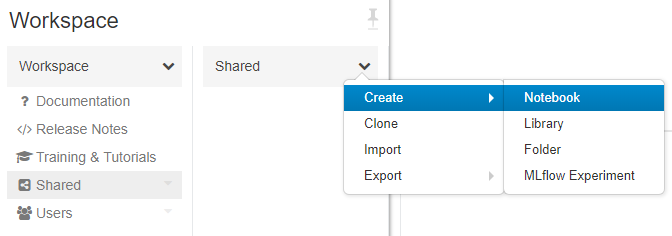
Workspace: New notebook
Let’s create our first notebook in Azure Databricks. You can do this at least two ways:
- Azure Databricks Common Tasks New Notebook
- Workspace Shared (folder) Arrow Create Notebook (see image below)
Azure Databricks: New Notebook
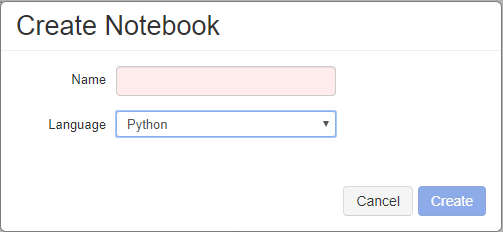
Then, name the new notebook and choose the main language in it:
Azure Databricks: Create Notebook
Available languages are Python, Scala, SQL, R.
I said “main” language for the notebook because you can BLEND these languages among them in one notebook. That means you can use a different language for each command. Furthermore, MarkDown (MD) language is also available to make comments, create sections and self like-documentation.
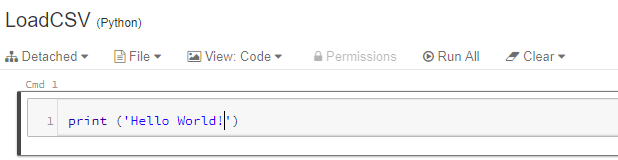
I named my notebook “LoadCSV”, so let’s put the first line of code in there (cmd 1):
Azure Databricks: First command
In my case default language is Python, but if I would like to apply another language for a specific command, the change must be declared in the first line:
%scala
%sql
%r
%python
For MarkDown language use %md and then write down things in MD in that cell:
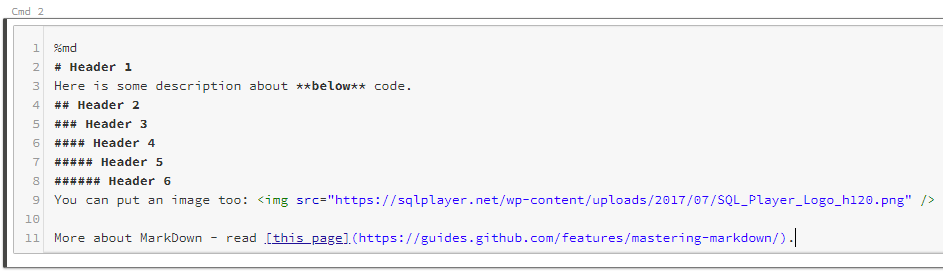
Azure Databricks: MarkDown in command (edit mode)
Once you click outside of the cell – the code will be visualized as seen below:
Azure Databricks: MarkDown in command (view mode)
Let’s add more code to our notebook. As an example, we will read a CSV file from the provided Website (URL):
import pandas as pd
url = 'https://www.stats.govt.nz/assets/Uploads/Business-price-indexes/Business-price-indexes-March-2019-quarter/Download-data/business-price-indexes-march-2019-quarter-csv.csv'
data = pd.read_csv(url)
Adding another few steps (commands):
Pressing SHIFT+ENTER executes currently edited cell (command). Try to do this on the first cell (print ‘Hello world’). Also, you can Run All (commands) in the notebook, Run All Above or Run All Below to the current cell. All these and other options are available on the right-hand side menu of the cell:

Azure Databricks: Cell’s options
But, before we would be able to run any code – we must have got cluster assigned to the notebook. Let’s create the first cluster.
Create a cluster
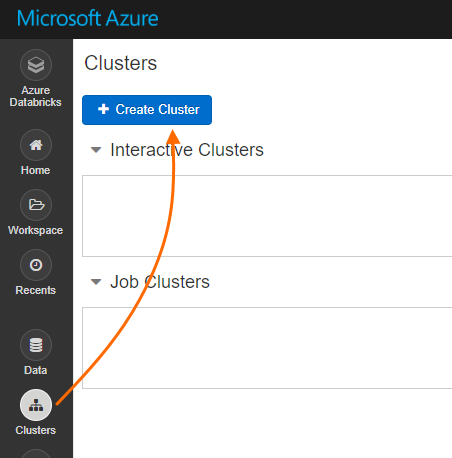
Select “Clusters” and click “Create Cluster” button on the top:
Azure Databricks: Create a cluster
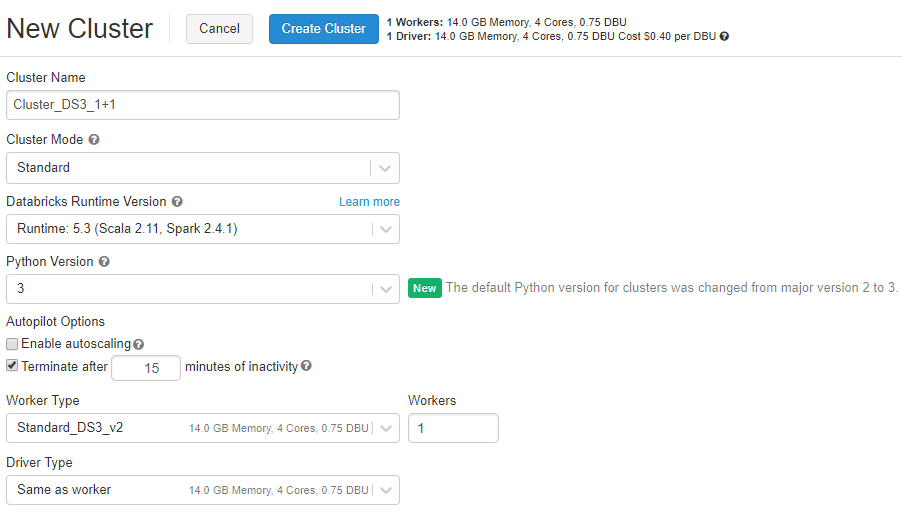
A new page will be opened where you provide entire cluster configuration, including:
- Cluster Name
- Cluster Mode – Standard or High Concurrency
- Databricks Runtime Version – choose one of predefined option.
- Python Version
- Enable autoscaling – I disabled this option for demo purposes. I don’t want to spin up too many nodes and pay for them.
- Terminate after: I set up 15 minutes (of inactivity). After that time pass – cluster will be automatically terminated.
- Worker Type – size node of each worker and the number of active nodes. I need only one.
- Driver Type – coordinator node
Azure Databricks: New cluster
Once you click “Create Cluster” on the above page – the new cluster will be created and getting run. Since that moment you are charging for 2 nodes (VMs) – driver node + 1 worker. At any time you can terminate the cluster leaving its configuration saved – you’re not paying for metadata.
Run notebook
The last thing you need to do to run the notebook is to assign the notebook to an existing cluster. Go to the notebook and on the top menu, check the first option on the left:
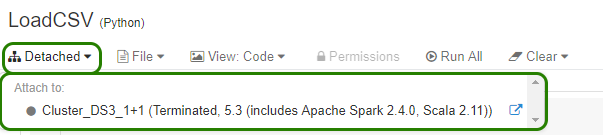
Azure Databricks: Assign cluster to notebook
Choose a cluster you need. If the cluster is terminated – you need to run it first…
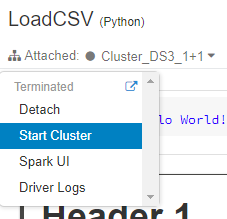
Azure Databricks: Start assigned cluster
… before click Run All button to execute the whole notebook.
Wait and check whether the cluster is ready (Running):

Azure Databricks: State of cluster
Export/Import notebook
Each notebook can be exported to 4 various file format. In order to do that, select from top-menu: File -> Export:
- DBC Archive
- Source file
- IPython Notebook
- HTML
The code presented in the post is available on my GitHub here. Intentionally, I exported the same notebook to all format stated above.
You can utilize Import operation when creating new Notebook to use existing file from your local machine.
Conclusion
As you can see – writing and running your first own code in Azure Databricks is not as much tough as you could think. Next challenge would be to learn more Python, R or Scala languages to build robust and effective processes, and analyse the data smartly.
In further posts of this series, I will show you other aspects of working with Azure Databricks.
Useful links
Platform Release Notes
Databricks documentation: Training & FAQ
Azure Databricks pricing
Microsoft Learn: Azure Databricks
About author

You might also like

Mapping Data Flow in Azure Data Factory (v2)
Azure Data Factory is more of an orchestration tool than a data movement tool, yes. It’s like using SSIS, with control flows only. Once they add Mapping Data Flows to

Auditing in Azure SQL Data Warehouse
The first article in a series on “Security Intelligence in Azure PaaS” inspired me to write something on auditing in Azure SQL Data Warehouse. To put it simply for anyone

Functions in the USQL – the hidden gem in the Summer 2017 Update
Hello SQL Folks. We all love USQL for its great extensibility and how it makes our life easier in some particular “area of data”. There are a lot of things


0 Comments
No Comments Yet!
You can be first to comment this post!