

Configuration of SQL Server instance
It is the fifth post on series related to installation and configuration of SQL Server client tools required.
This series is for professionals who start their journey with SQL Server administration and also for those who want to extend and structure their knowledge on SQL Server administration.
Preparations
We are starting with the following assumptions:
- All steps described in this first blog post has been configured
- ISO file with SQL Server binaries and Cumulative Update files are available – steps how to download it are described in the second blog post
- There is a connection between Windows server and domain controller
- No issues with connectivity with Active Directory domain (no AD-related errors in System Event Log)
- SQL Server instance is installed as described in the second blog post or third blog post
- Management tools are installed as described on forth blog post
Configuration using SQL Server Configuration Manager
Start SQL Server Configuration Manager and browse to SQL Server Network Configuration node and select Protocols for MSSQLSERVER
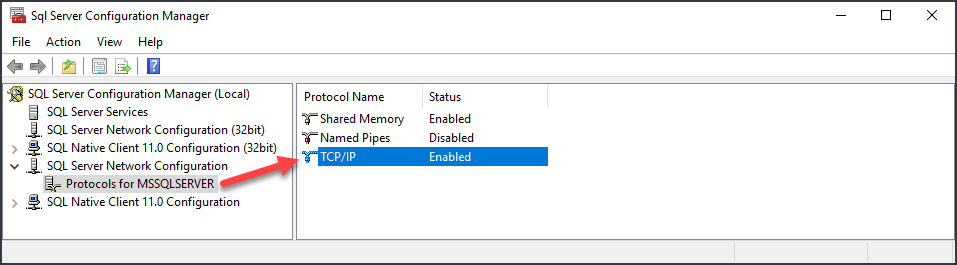
By default only Shared Memory option is enabled thus access to SQL Server is possible only from local machine. To enable remote access to SQL Server you need to change TCP/IP option by right-clicking and selecting Enable option.
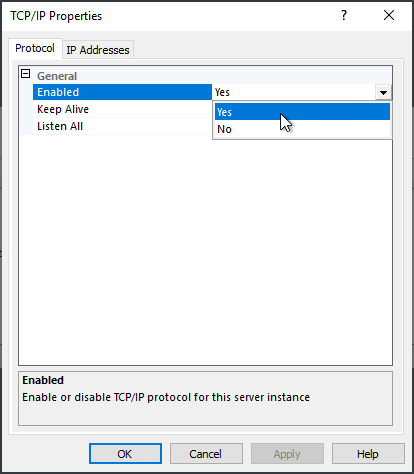
Alternatively, you can go to properties and change Enabled option from No to Yes.
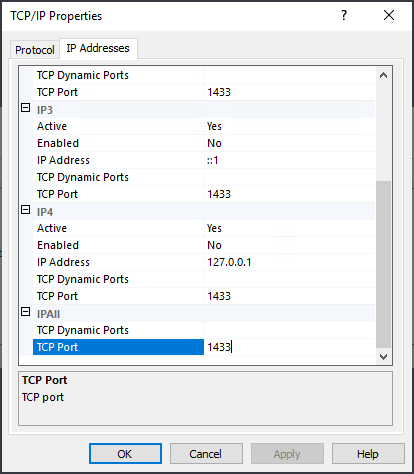
As a second step, go to “IP Addresses” tab and scroll down to “TCP Port” option under IPAll section. SQL Server is using well-known port 1433, however, it is advised to use other than the default port. It will protect you from automated tools that scan a network for appearance of SQL Server.
Save changes and go to SQL Server Service and check if SQL Server Engine and SQL Server Agent are configured to have Automatic Startup Type.
SQL Server Browser should be left Disabled.
As the last step in SQL Server Configuration Manager, you can set trace flags to be enabled during start of the SQL Server services. Below there is a list of the trace flags that can be considered to be used on Production use:
- T1117
- T1118
- T4199
More information about trace flags you can find on the following link.
Review of the instance after installation using SQL Server Management Studio
Checking Service Principal Names
As a first step, we are going to connect to SQL Server instance using SQL Server Management Studio.
Start SQL Server Management Studio and connect to the SQL Server Instance (local server in our case).
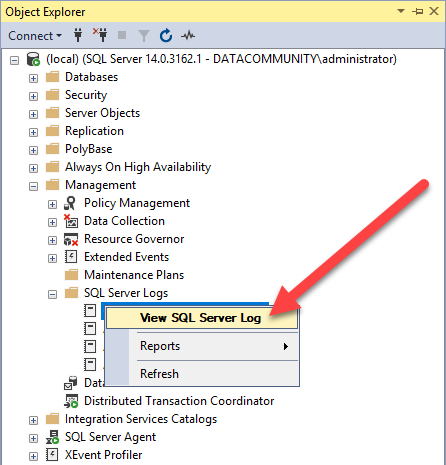
Go to instance name, Management, SQL Server Logs and select first one from the list (current one):
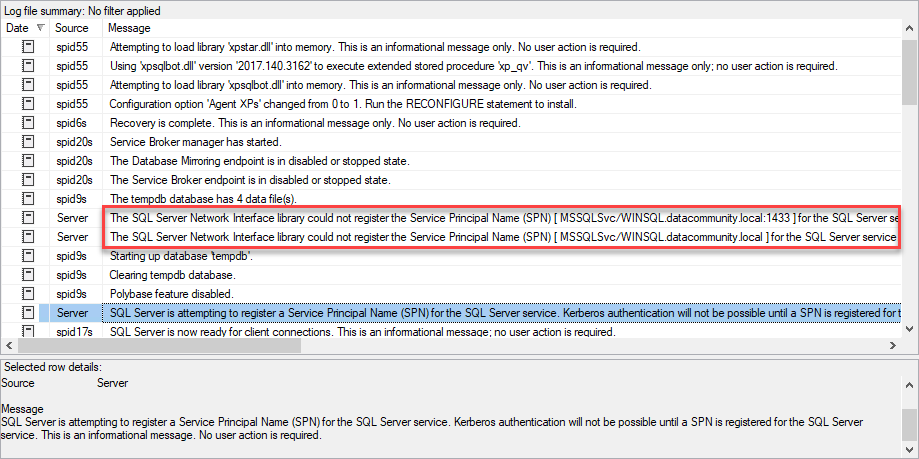
Review all SQL Server Log entries and note if there is anything with warning or error message.
One of the most common issues that can be found after installation is an issue with registering Service Principal Name for SQL Server Engine account. The message in the SQL Server Log is as follows:
SQL Server is attempting to register a Service Principal Name (SPN)
for the SQL Server service.
Kerberos authentication will not be possible until a SPN is registered
for the SQL Server service. This is an informational message.
No user action is required.
The SQL Server Network Interface library could not register the
Service Principal Name (SPN) [ MSSQLSvc/WINSQL.datacommunity.local ]
for the SQL Server service.
Windows return code: 0x200b, state: 15. Failure to register a SPN
might cause integrated authentication to use NTLM instead of Kerberos.
This is an informational message. Further action is only required if
Kerberos authentication is required by authentication policies and
if the SPN has not been manually registered.
The SQL Server Network Interface library could not register the
Service Principal Name (SPN) [ MSSQLSvc/WINSQL.datacommunity.local:1433 ]
for the SQL Server service.
Windows return code: 0x200b, state: 15. Failure to register a SPN
might cause integrated authentication to use NTLM instead of Kerberos.
This is an informational message. Further action is only required if
Kerberos authentication is required by authentication policies and
if the SPN has not been manually registered.
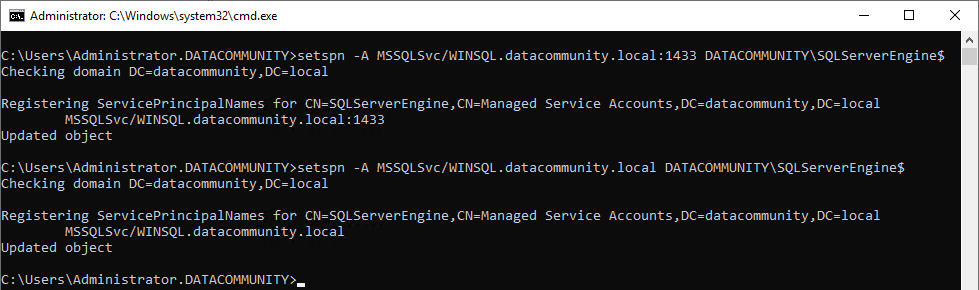
To fix this issue there is a need of registering SPN for SQL Server Engine by taking values from the SQL Server Log messages and running setspn command (it requires domain admin permissions)
setspn -A MSSQLSvc/<hostname>:1433 <SQL Server Engine account>
setspn -A MSSQLSvc/<hostname> <SQL Server Engine account>
In our case commands looks as follows:
setspn -A MSSQLSvc/WINSQL.datacommunity.local:1433 DATACOMMUNITY\SQLServerEngine$
setspn -A MSSQLSvc/WINSQL.datacommunity.local DATACOMMUNITY\SQLServerEngine$
To list all SPNs registered for specific service account you can use the following command:
setspn -L DATACOMMUNITY\SQLServerEngine$
The output should like as follows:

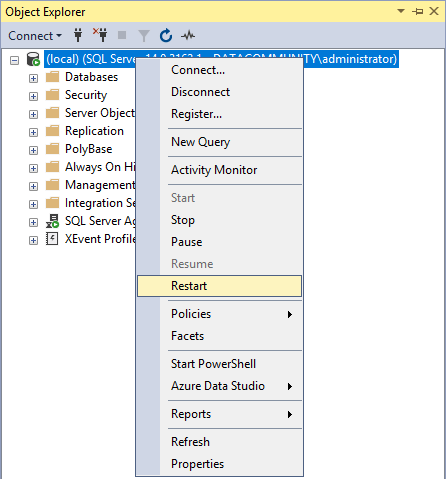
After registering SPNs restart of SQL Server service is required:
Check SQL Server Log after the restart – SPNs should be registered successfully.
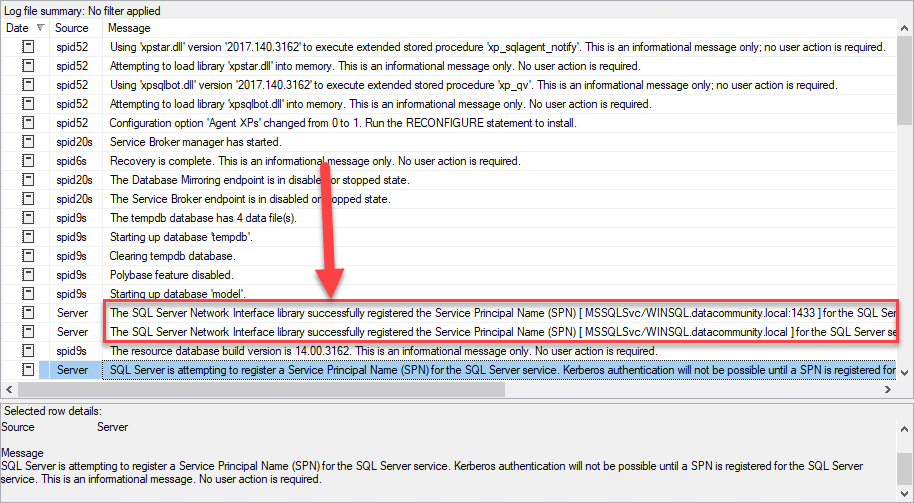
Note: SPNs and communication using Kerberos authentication is critical when using SQL Server features like SQL Server Reporting Services, AlwaysOn Availability Groups, etc. Make sure that SQL Server Log is clear from any issues and SPNs are configured correctly.
Instance configuration using SQL Server Management Studio
Now let’s move the configuration of the Instance.
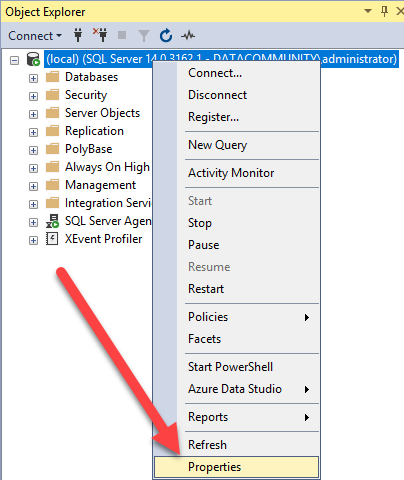
Right click on the instance name and go to Properties:
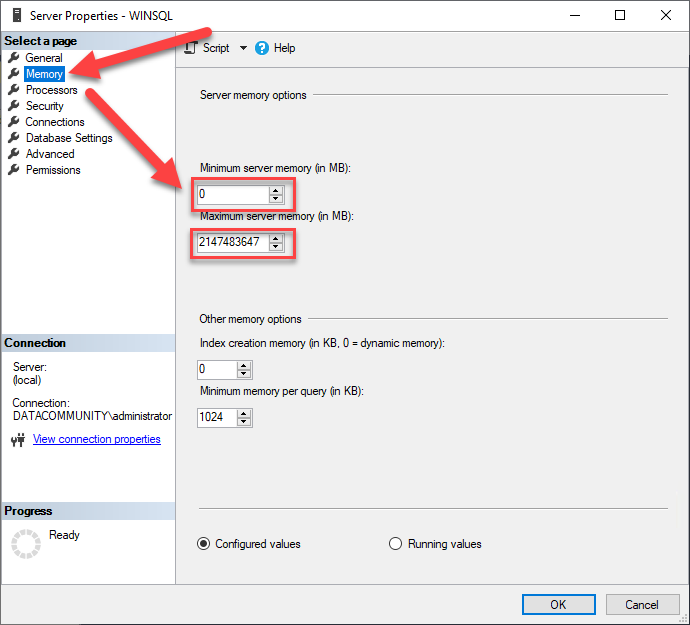
Go to Memory and modify Minimum and Maximum Server Memory to match the following formula:
– Maximum Server Memory = Amount of RAM on your machine – (minus) 4GB (for Operating System)
– Minimum Server Memory = half of the value of Maximum Server Memory
Example: Server has 64 GB of RAM, thus Maximum Server Memory should be 60 GB (61440 MB) and Minimum Server Memory should be set to 30 GB (30720 MB).
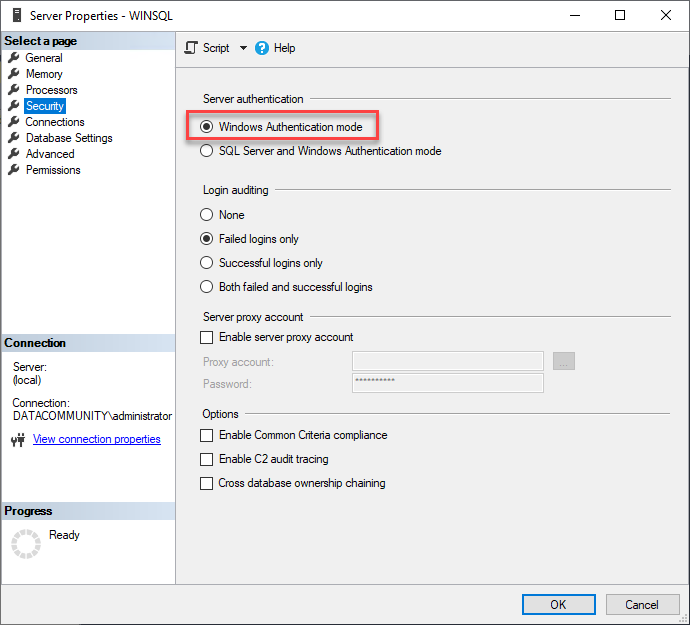
Go to Security and check if Windows Authentication mode is selected. This authentication mode is safer than SQL Server authentication mode thus is advised to be used on a Production system.
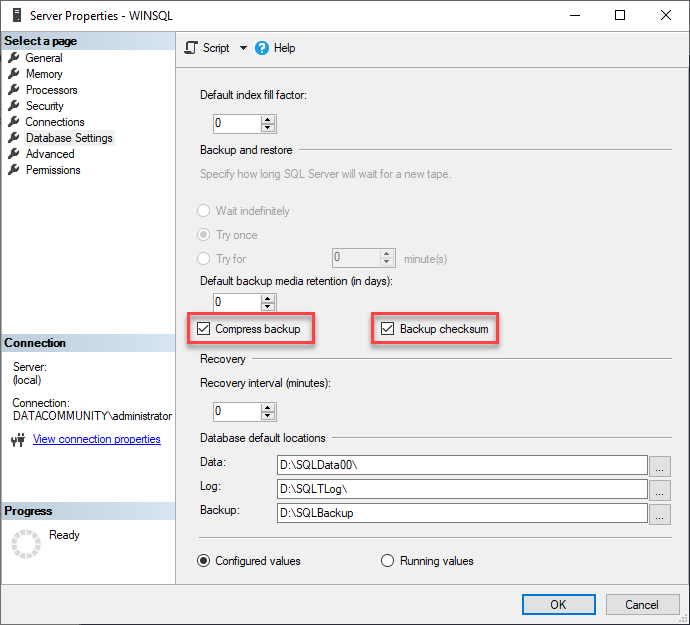
Go to Database Settings and enable Compress backup and Backup checksum options. Validate if paths provided in Database default locations are correct
Go to Advanced and modify Cost threshold for Parallelism to value 50 and Max Degree of Parallelism to number of processors on your machine but not more than 8
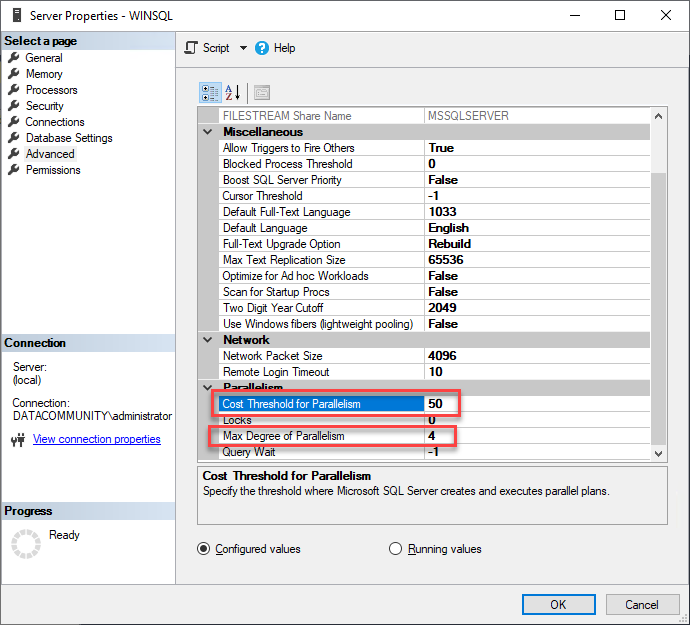
You can close Server Properties window by clicking on OK – your server has been configured for better performance.
However, not all options are available in the Graphic User Interface and configuring more than one server with this approach can be tedious task thus there is another better way of doing it: using T-SQL commands described in next section.
Reconfiguration using T-SQL
As a first step, we are going to connect to SQL Server instance using sqlcmd program. It is command line program thus you need to start cmd
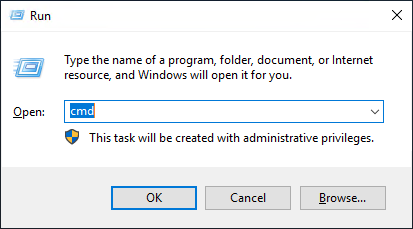
Once cmd is started check if it is running with administrators permissions:

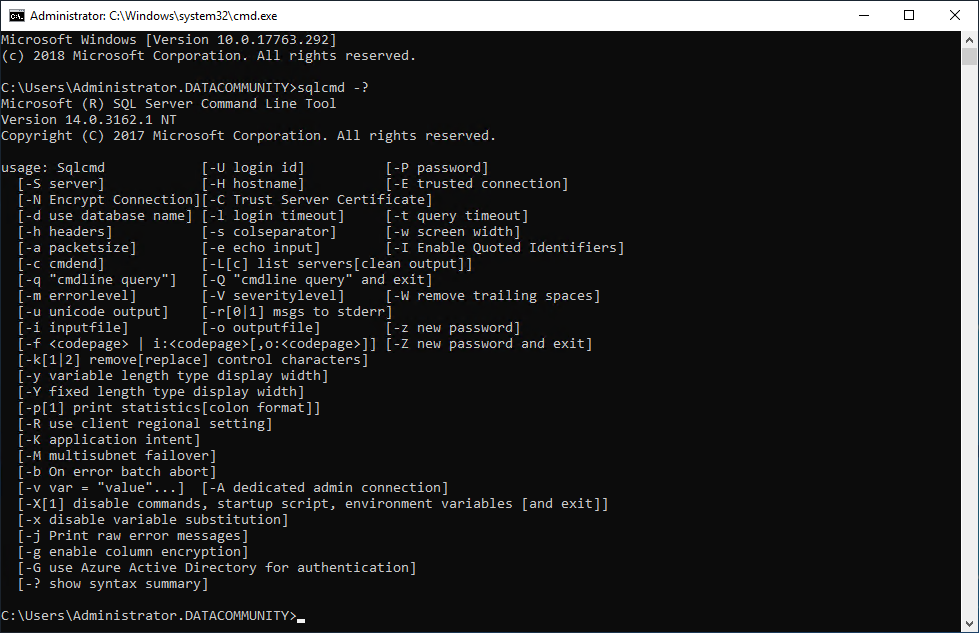
Now you can run sqlcmd command with correct arguments. For the list of arguments run:
sqlcmd -?
You should have a list of all arguments that can be used for the sqlcmd:
Connect to the SQL Server located on the same machine by running following command
sqlcmd -S.
Note: option -S specifies a server, in our case, it is local server so “.” is used. You can also use (local)
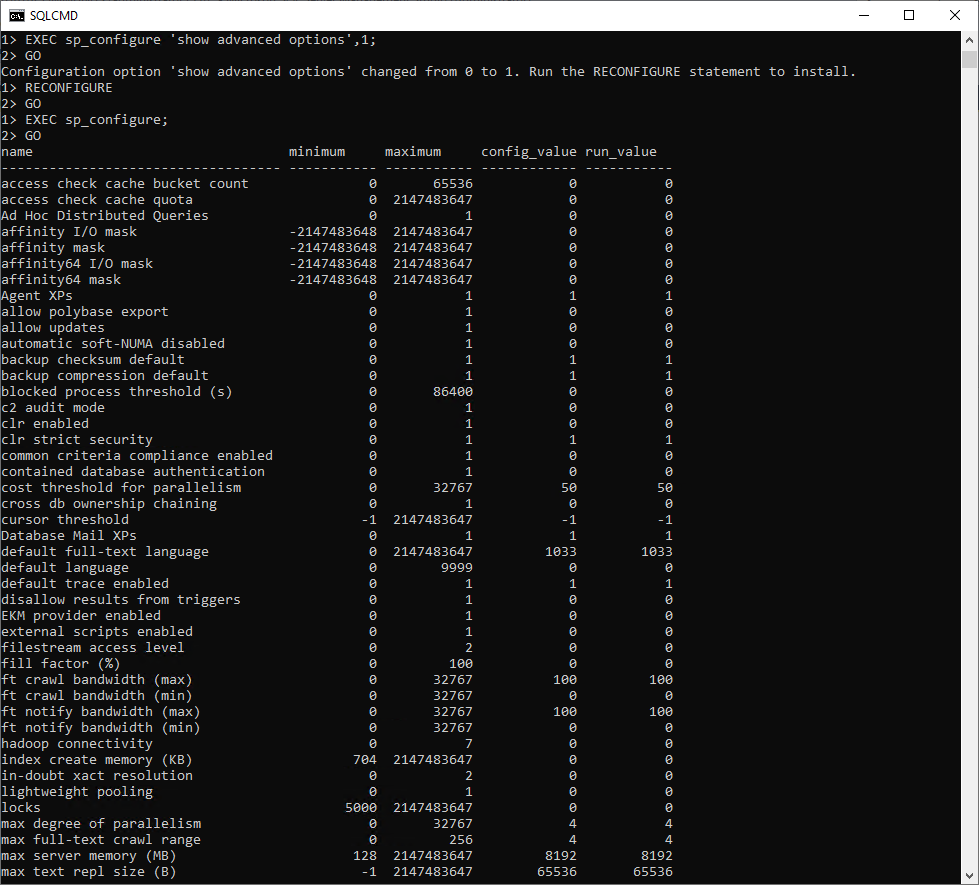
and running following T-SQL command to list configuration options of the SQL Server instance:
EXEC sp_configure;
GO
There should be following the output of the query:

Note that show advanced options is set to 0, so not showing all available options.
To change this behaviour run following command:
EXEC sp_configure 'show advanced options',1;
GO
The output of the query should contain much more entries than before:
The interesting options for us are options for modifying the following options:
- backup checksum
- backup compression
- cost threshold for parallelism
- Database Mail XPs
- max server memory
- min server memory
- max degree of parallelism
- remote admin connections
Note: For Remote Admin Connections TCP Port 1434 needs to whitelisted on the server where SQL Server instance is installed.
Following T-SQL statement modifies above settings:
EXEC sp_configure 'backup checksum default',1
EXEC sp_configure 'backup compression default',1
EXEC sp_configure 'cost threshold for parallelism',50
EXEC sp_configure 'Database Mail XPs',1
EXEC sp_configure 'max server memory (MB)',8192
EXEC sp_configure 'min server memory (MB)',4096
EXEC sp_configure 'max degree of parallelism',4
EXEC sp_configure 'remote admin connections',1
EXEC sp_configure 'show advanced options',0;
RECONFIGURE
GO
Below screenshot with all commands and the output:
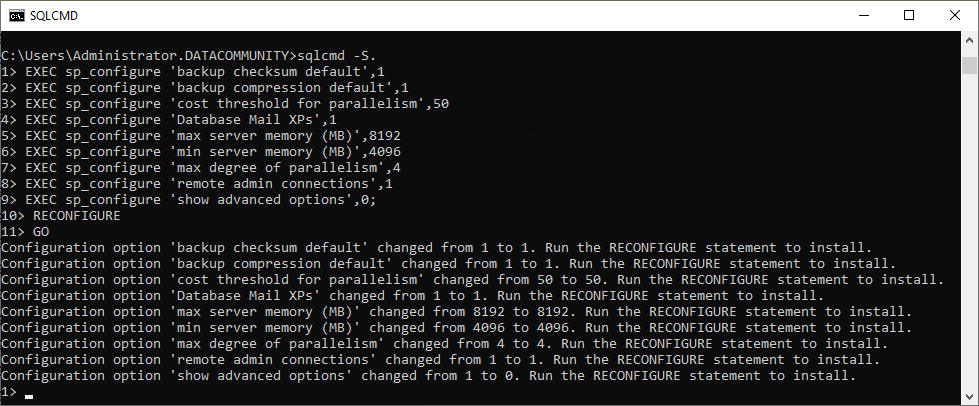
You have successfully configured the SQL Server Instance.
Summary
Configuration of the SQL Server instance is one of the most important steps after installation, that often is overlooked. This blog post describes how to configure the instance using both SQL Server Management Studio and sqlcmd program. The latter option can be used in environments where more than one SQL Server is installed in a time efficient way.
Links
More information about steps described above can be found on the following sites:
SQL Server Configuration Manager
SQL Server Trace Flags
Register a Service Principal Name for Kerberos Connections
Server Memory Server Configuration Options
Configure the cost threshold for parallelism Server Configuration Option
Configure the max degree of parallelism Server Configuration Option
sqlcmd Utility
About author

You might also like

Preparation for SQL Server installation
It is a first post on series related to installation and configuration of SQL Server installations. This series is for professionals who starts their journey with SQL Server administration and

What is containerization?
It is the first post on series related to installation and configuration of containers on the Microsoft Windows platform. This series is for professionals who start their journey with the

Unattended installation of SQL Server
It is a third post on series related to installation and configuration of SQL Server installations. This series is for professionals who start their journey with SQL Server administration and


0 Comments
No Comments Yet!
You can be first to comment this post!