

Installation and setting up Power BI Gateway
In this short post, I will show you step by step on how to install two different modes of a Power BI Data Gateway.
What is it this Data Gateway?
Let’s start from the beginning: What exactly is the Data Gateway?
Data Gateway works just like a bridge that creates a connection between on-premises data (who are not in the cloud) and Power BI cloud-based service. You can install Data Gateway in any servers in the local domain.
We have different two types of Data Gateway:
- Personal Mode
- On-Premises (also called as Enterprise Mode)
You can install both modes of gateway for free. Below, I explain these two different modes of Data Gateway and I will show you the installation process.
OK, let’s do something…
Installation
Before you start the installation you should think about which type of Data Gateway you want. Recommended is On-premises Mode because it gives you more capabilities than the personal mode.
Minimum Requirements
- .NET 4.6 Framework
- 64-bit version of Windows 7/ Windows Server 2008 R2 (or later)
Recommended
- 8 Core CPU
- 8 GB Memory
- 64-bit version of Windows 2012 R2 (or later)
Although we have two different modes of a gateway – there is only one file to be downloaded, from here:
https://powerbi.microsoft.com/en-us/gateway/
Downloading Power BI Gateway
Download the file (gateway) and save file:
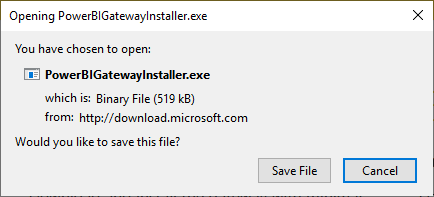
Power BI Gateway Installer
When you run the downloaded file – you can choose which gateway you want to install:
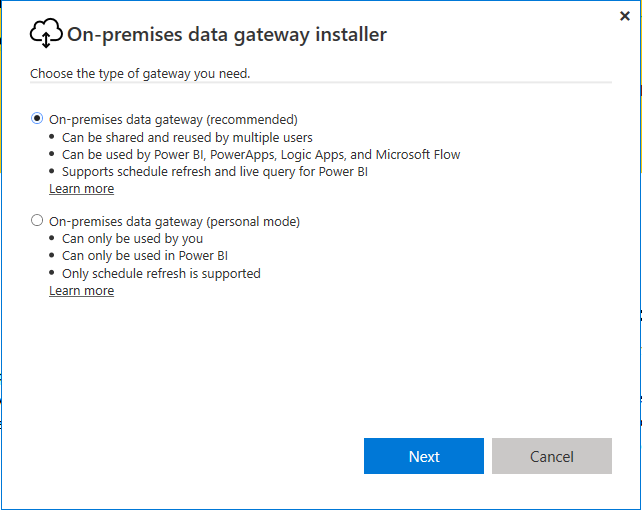
Type of data gateway
Just like I wrote above, we have two types of Data Gateway Mode.
Power BI Gateway: On-premises Mode
This On-premises was created for a multi-developer environment. Here multiple people can work on the same Data Gateway if the administrator authorized them before. With this Data Gateway, you will have much more fun than Personal Mode. Why? Because of on-premises support not only Power BI just like his brother Personal Mode. Here you can provide quick and secure data transfer between data which is not in the cloud and Microsoft cloud services: PowerApps, Microsoft Flow, Azure Analysis Services, and Logic Apps and of course Power BI. Depending on your needs, you can choose one of them.
How to install On-premises Data Gateway
In the first step choose On-premises:

On-premises data gateway
After this, you will see the installation process ongoing:
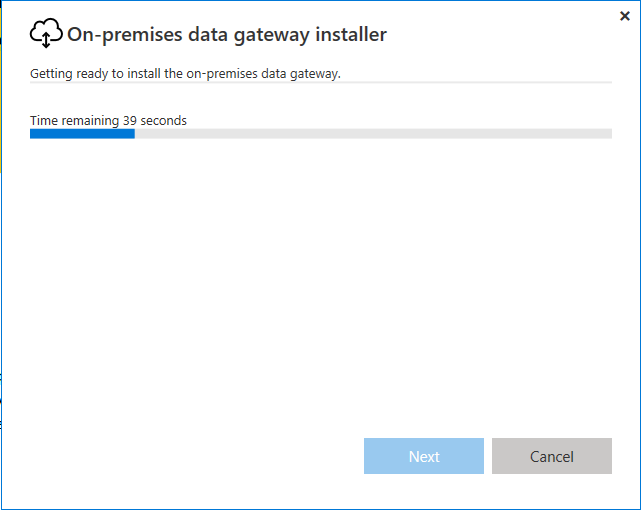
Installation process
When installation it’s almost done you must register your gateway. The first step to do this is to input your email:
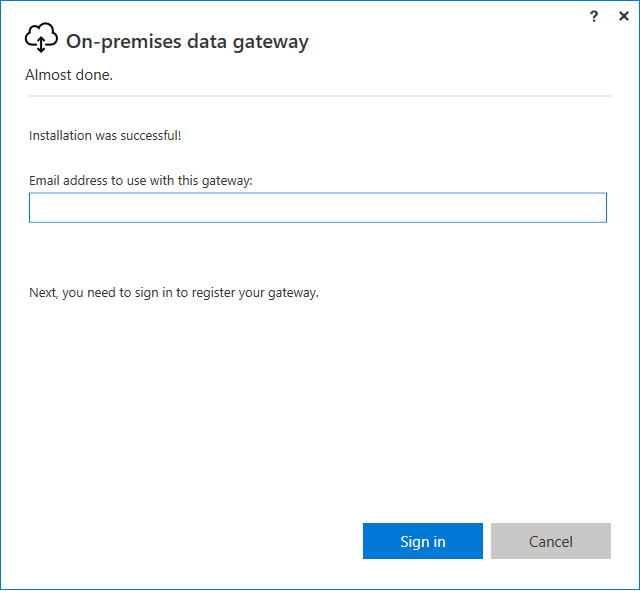
I named my gateway “pola-gate”, you can name it whatever you want.

Register the gateway
In the second step, you must name your gateway. I’m naming it “pola-gate”.
After that, you must create your (name it) ‘Recovery key’.
icon-bell The recovery key is so important. For example:
- if you change you decide to uninstall the gateway the recovery key will help you avoid other problems with changing all connections.
- The second situation where you need the Recovery key will be if you want to move your current gateway form one machine to another without changing connections.
So, just like with your password, keep your Recovery key in a safe place.
When the installation process is finish – you will see green tick with a message that the gateway is online and ready to go:
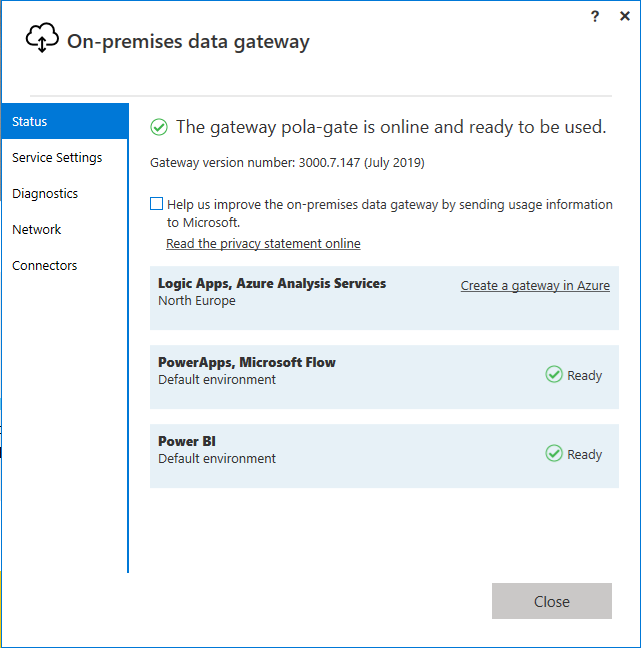
The gateway is ready to be used
So, we have our shiny-new Power BI Gateway up and running on-premises. What’s next?
Power BI service: Where is my gateway?
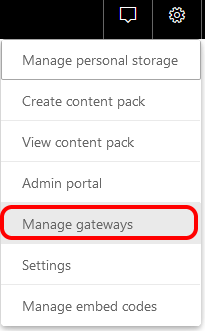
OK, this type of gateway you can find in your Power BI services.
If you go to settings panel in Power BI services you will see Manage gateways.
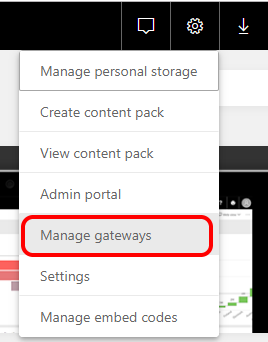
Manage gateways
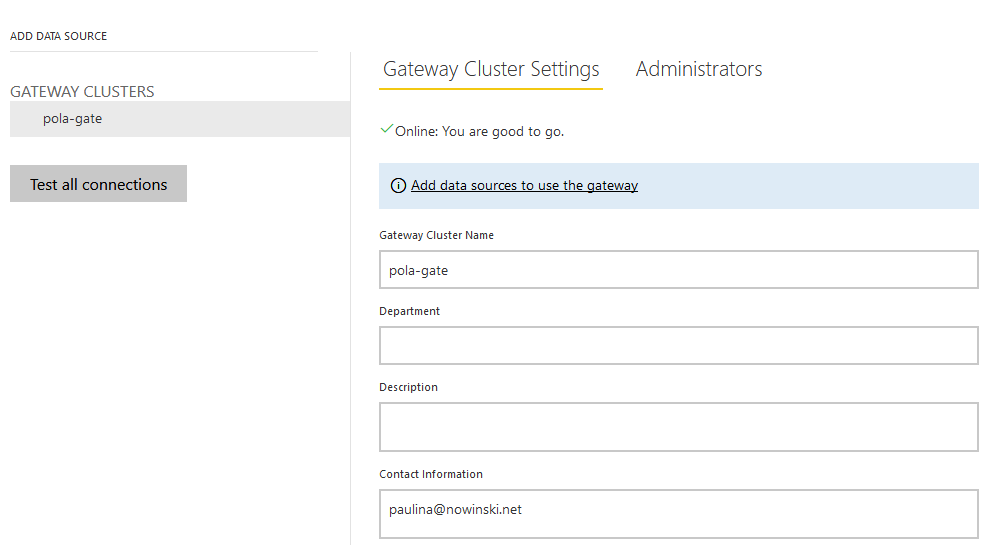
When you click ‘Manage gateways’ you will see the gateway which we have installed as ready to use.
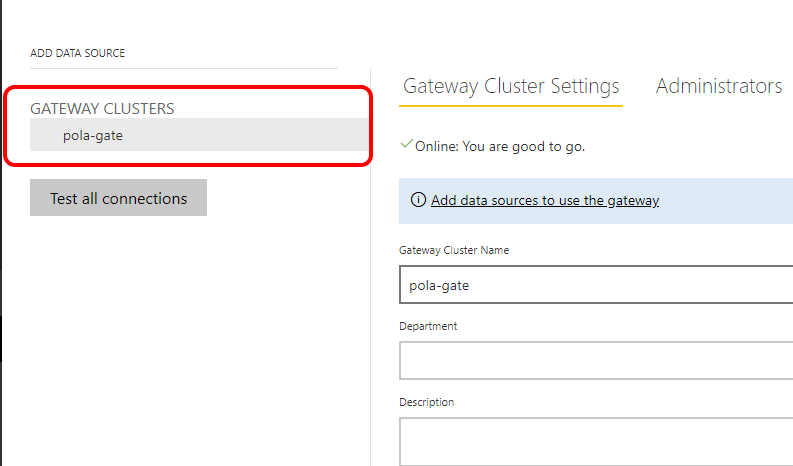
Gateway Cluster Settings
Power BI Gateway: Personal Mode
The personal mode can be used only by one business analyst person. This gateway is only for Power BI – cannot be used for other applications just like On-premises. Of course in this type, you can share your Power BI reports with other users but you will be the only one who has administration access. Installing this type is easy-peasy.
How to install the Personal Mode
In this case, the installation process is very similar just like On-premises. Here you don’t need the gateway’s name and you don’t need the recovery key. It’s a small thing that you should know it can not be moved to any other machine.
First, choose the personal mode before you click Next:
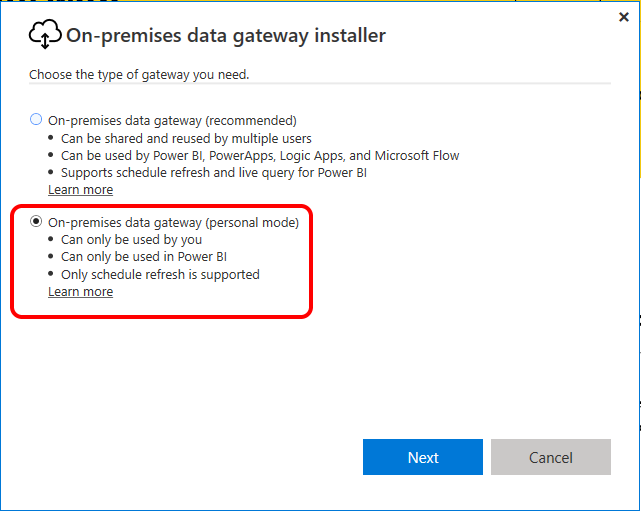
How to install personal mode data gateway
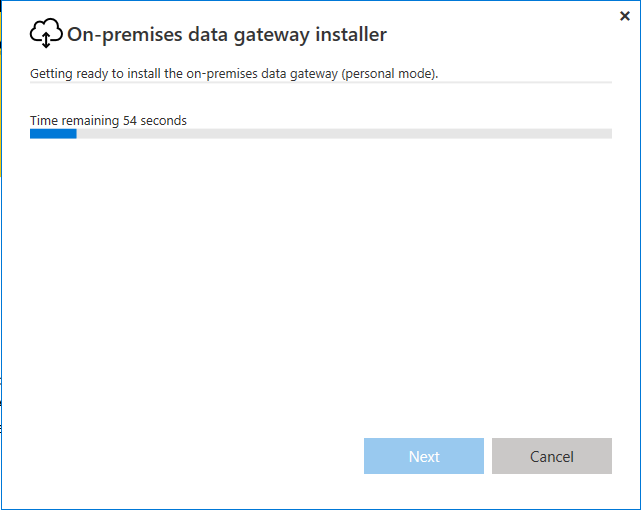
Process installing on-premises data gateway
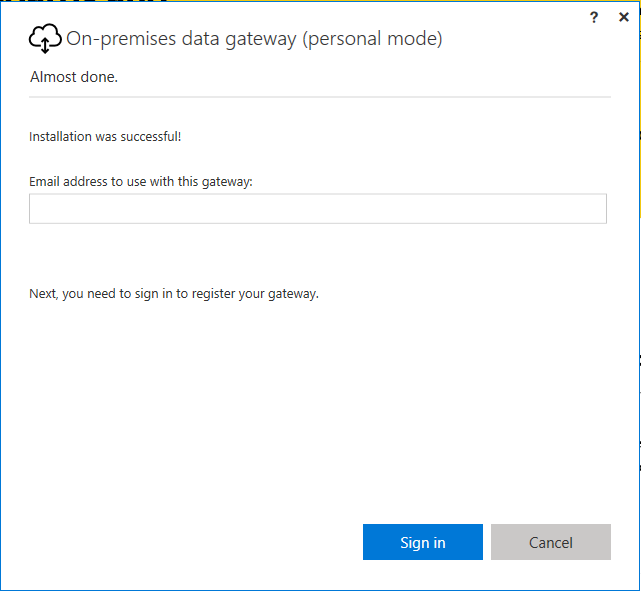
Adding e-mail address
Add your Email address. After this, you will see:
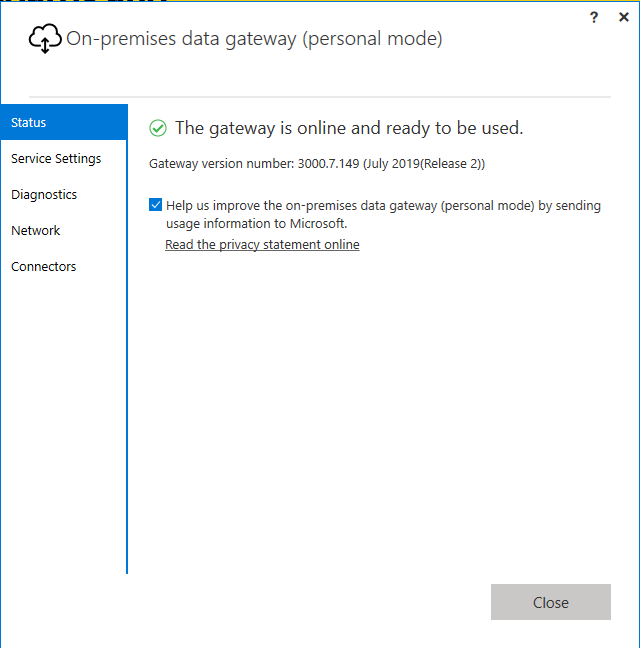
Data gateway personal mode ready to use
Congratulations! Your Personal Mode Gateway is ready to use.
*The one thing that you should know is that you will not see the personal mode in Power BI services just like On-premises.
Power BI Services
Once you installed the gateway on a computer, it will be nice to complete this job by adding a data source to the gateway.
Why? The answer is simple. Because the Data Gateway is the only bridge between the cloud and data sources in your domain (enterprise). So, you need to build this bridge by letting Power BI service know where is a particular server and database located in your local network and how to connect to it.
Hence, you should add new data sources to your available gateway. You can add single or multiple data sources.
Adding data sources
Here you can find the list of available data sources type https://docs.microsoft.com/en-us/power-bi/service-gateway-data-sources#list-of-available-data-source-types
Now, when you log in to Power BI services click the gear icon. Then click Manage gateways:
Adding sources to Power BI Services
After this step, you can add data sources. If you want to add multiple data sources you must repeat this process for every single data source.
Steps how to add sources to use gateway
In this step you must complete the required information:
- Data Source Name
- Data Source Type
- Server
- Database
- Authentication Method
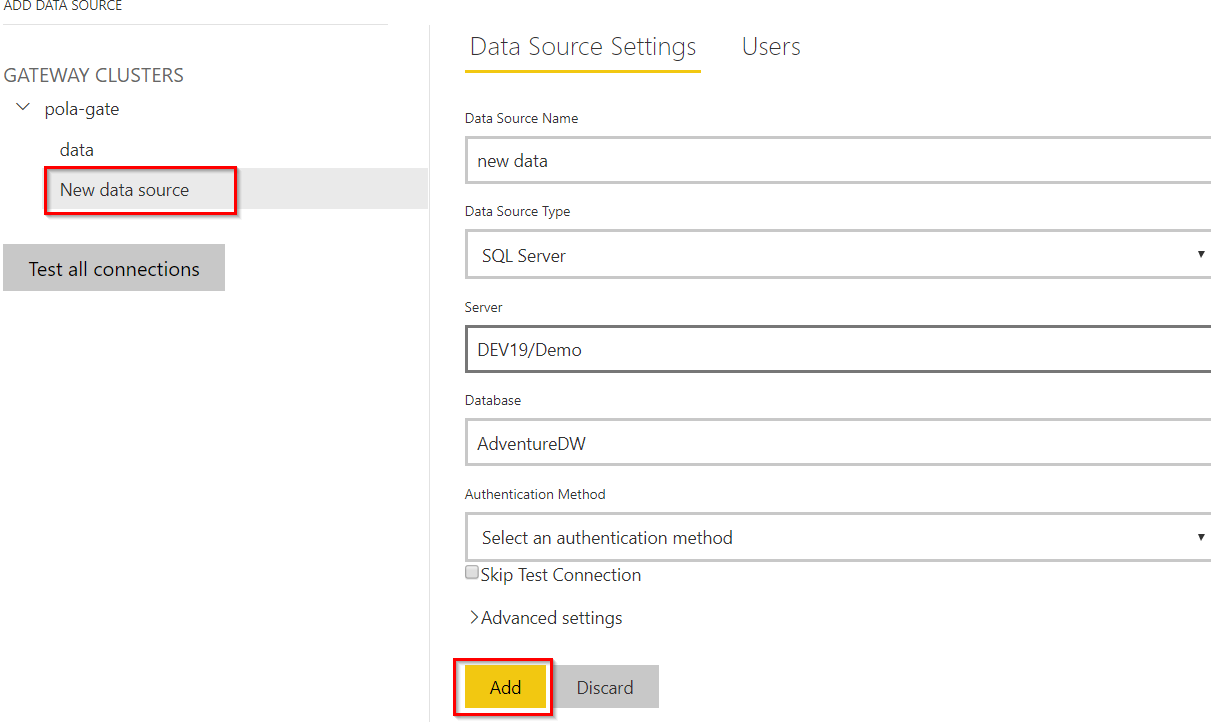
The last step to add sources in data gateway in Power BI services
The server and Database must be the same as your data source setting in the Power BI report.
Click Add button, and if you see Connection Successful the process succeeds. Now you can use these data sources in your Power BI.
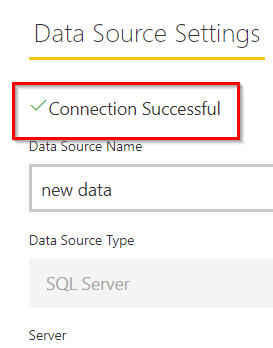
Connection Successful
Remove data sources
If you decide to remove your data sources from Gateway in Power BI Service, back to data sources and there click the ellipsis and Remove.
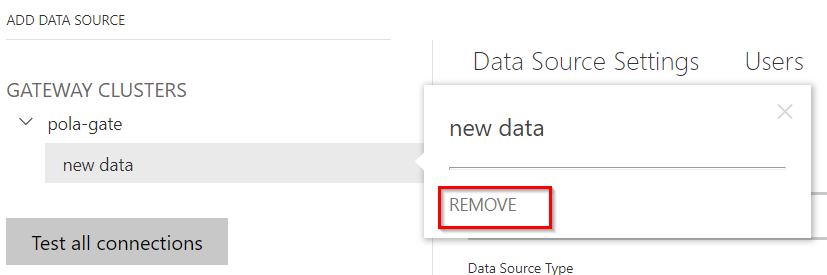
How to remove sources form data gateway
icon-star Remember: when you remove data sources, any dashboards, and reports whose are based on these sources will be broken.
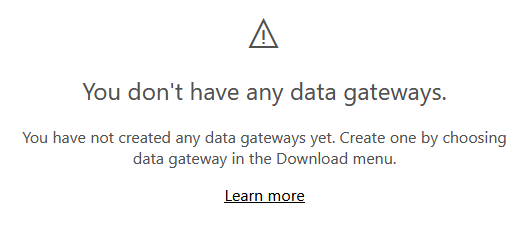
How to remove Data Gateway from Power BI Services?
When you decide to not use them anymore you can do this in a very easy way.
Go to Power BI Services -> Settings -> Manage Gateways – in this place select the one you do not need anymore and click the ellipsis and click Remove.

How to remove data gateway from Power BI Service
After this, you can see communicate:
How to remove Gateway from your computer?
Go to the Control Panel in your computer, there find Programs and Features:
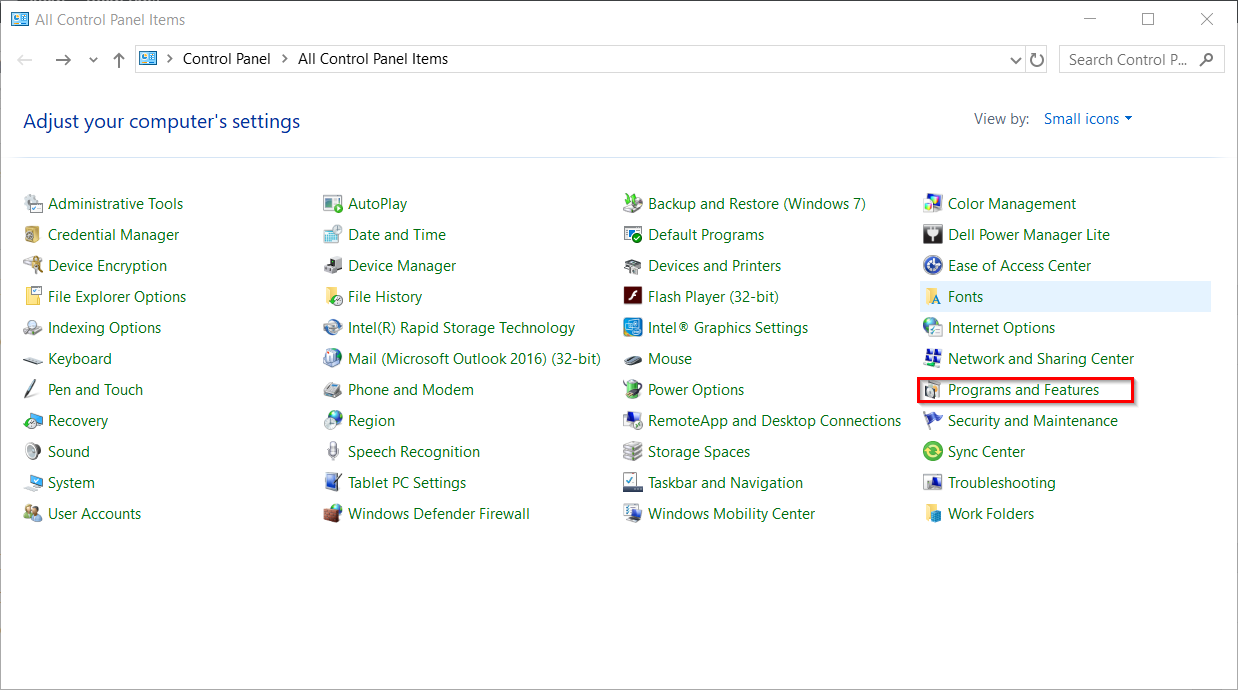
Removing data gateway from computer
Then you must find an application that you want to remove, in this case, it is “On-premises data gateway”. Afterwards, you must tick and select the application and click the “Uninstall” button to begin the uninstallation process.
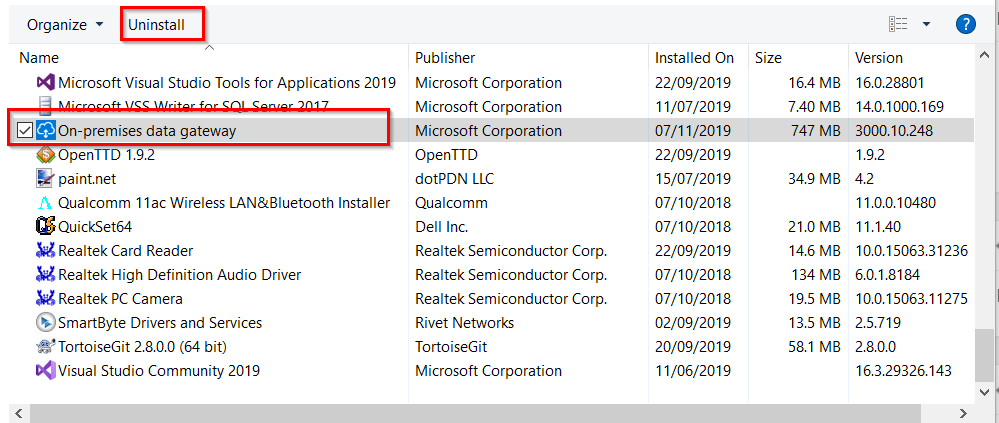
Last step uninstalling on-premises data gateway from computer
Your Gateway will be removed from your computer and you will be able to reinstall the application if needed.
Now, I hope that you know a little bit more about Data Gateway in Power BI. What is it? Why we can need them? How to install both modes of Data Gateways and which one is more suitable for you? So, if somebody asks you during an interview about Data Gateway in Power BI, you would easily explain what it is.
See you in the next post.
About author

You might also like

How to start with Power BI Desktop
This part of blog is for a people who never had contact with programming or Power BI. I’m want to show you that is impossible understanding this amazing tools without

Starting from zero – Temporal tables, part 1
The ability to query and make use of historical data is very important for the end users. We are obliged to keep the historical data for some period of time.

Starting from zero – Temporal tables, part 3
Today I would like to show how to implement temporal table solution when you have an existing table already present in the database. But this will not be all you


2 Comments
Installing Power BI Gateway – Curated SQL
November 18, 13:10[…] Paulina Nowinska shows how to install the Power BI Gateway in its two separate modes: […]
Power Bi Gateway Login - LoginCrunch
September 01, 12:32[…] 10. Installation and setting up Power BI Gateway | SQL Player […]