

Showing images in gallery using URL to blob storage
Today, I explain how to create a simple app in Microsoft Power Apps where:
- the data are located in Excel,
- the table contains the path to the images from public Azure Blob Storage,
- the app displays images directly from Blob Storage based on the path defined in the database (Excel file).
Why I used Azure Blob Storage to container my photo?
Most people use Excel to create a table that can be imported to Power Apps. When we got the photos, it’s better to get them in Azure Blob Storage because it’s highly scalable and allocates the appropriate resources to keep up with demand. Furthermore, relational databases (like SQL Server) are not designed for storing binary data (like images).
Now, a few words about my table:
I created a table with fragrance. Inside the table, you can find the name of perfumes, brand, scent note, gender, and of course photos for every fragrance. Because I use an Excel table with the path to the images, I want to display these images further in my gallery control (in Power Apps).

Excel File – Fragrances Table
Before we go to the part where I create an application in Power Apps with Excel file as source, we must do the following steps:
- Create a folder (container) in Azure Blob Storage and choose the type of container in Azure Blob Storage, where we gonna magazine our URL link with photos.
- Uploaded images to Azure Blob Storage
- Generate URL link
- how to copy a link with a photo from Azure Blob Storage to Excel and what to do after that.
Step 1. Create a folder (container) in Azure Blob Storage and choose the type of container in Azure Blob Storage
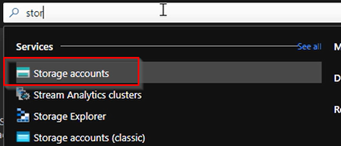
For the beginning – log on to portal.azure.com
Then, search Storage accounts and create new storage (or use the existing one if you already have one).
Storage Account in Azure Blob Storage
Inside you can see four icons:
- Containers,
- File shares,
- Tables,
- Queries

Types of storage in Azure Blob Storage for this case, I’ve opened Containers and on this level, I create availability for my link. After that, I added a new Container and named it – the name of a new container must be unique, just like the name of the file. Because every object which is stored here has an address that includes your unique account name.

Creating container in Azure Blob Storage
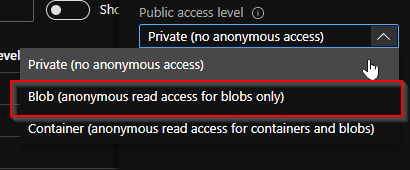
After that, I decided on the availability of the folder.
You have three availability options to choose from:
- Private – no anonymous access;
- Blob – anonymous read access for blobs only;
- Container – anonymous read access for containers and blobs.
I selected Blob – this access level allows everyone to see my files, but not my containers. Which is perfect for this case.
Three availability options.
Step 2 Uploading images
When a container was created successfully we can upload a file. Do click upload and open a new panel where we store a file.

Upload file to Azure Blob Storage
After that, you can download as many photos as you need and upload them to the container. Files can be uploaded to Azure Blob Storage in several ways, we use the easiest one – by Azure portal.
Small tips:
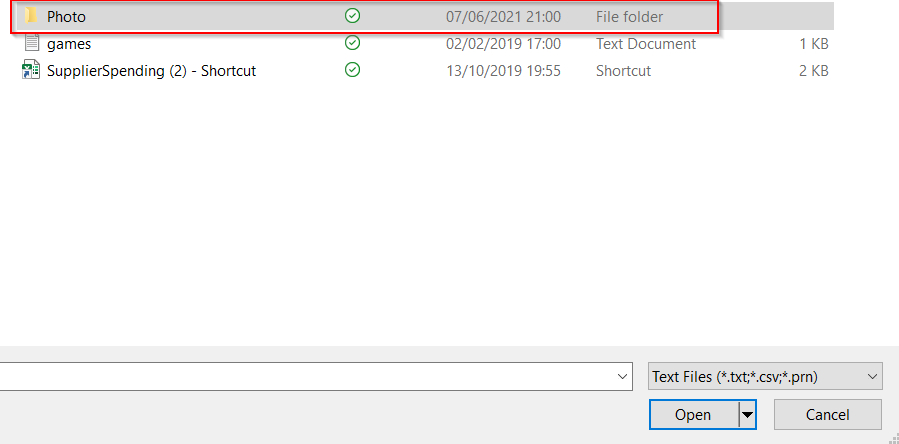
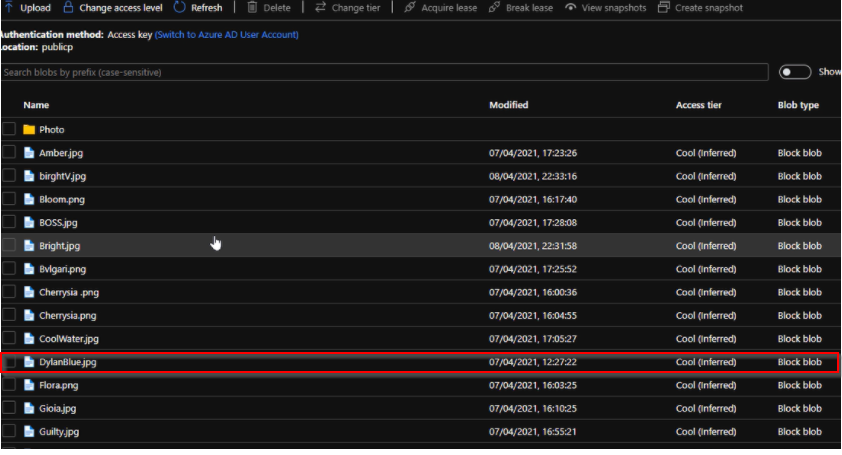
When we opened the file you can see a list of all of my fragrance photos which I used to create my excel spreadsheet. All my photos got short-named. It’s easier to copy that name into the URL link. For this example, I use the filename “DylanBlue” (see picture below).
After these steps, I’ve copied the file name and type of file [2] and paste them the into last part of my main URL link.
File with the name of photos.
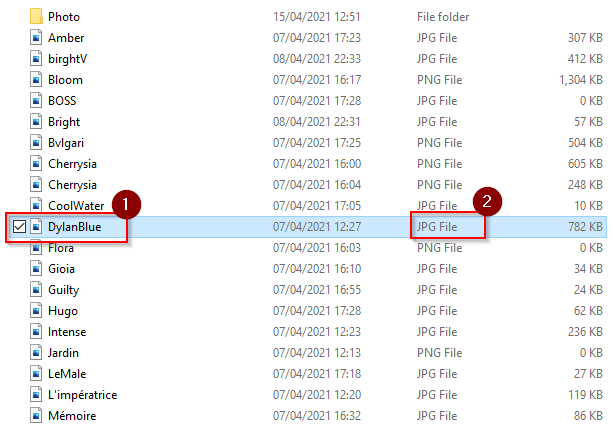
When the file was uploaded successfully, it’s available in the container – the picture below:
Uploaded photos to Azure Blob Storage.
Step 3 Generate URL link
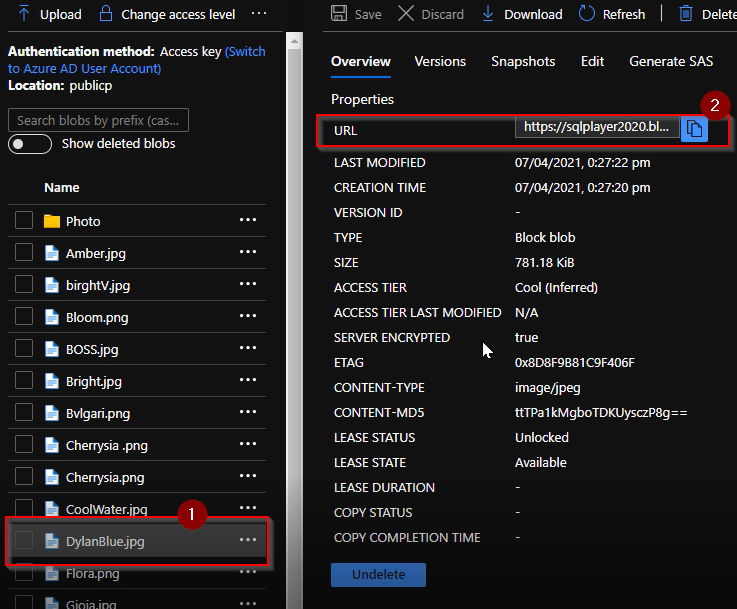
From the list, I selected one photo (for this example: DylanBlue.jpg) [1], after that, I copy (to the clipboard) the URL link [2]. I’ve got the main URL link where I will replace the last part of the link with another name of photo, which will be used in the Excel table.
When I paste the content of the clipboard to Notepad (or any other editor), I could see the whole link:
Generate a link from Azure Blob Storage.
The link consists of three parts:
1. the name of the storage account (sqlplayer2020 in this case)
2. the name of our folder (container) – in this case: “publicp”
3. the name of our photo and its format/extension
The last part will be changed each time – it contains the name of our photo and its extension. In this case, all files will be saved in JPG or PNG format.
In order to test whether the URL works fine – just paste the URL to the browser and an image should be shown:

URL to DylanBlue.jpg file in Azure Storage
Then you can see a photo assigned to the name:
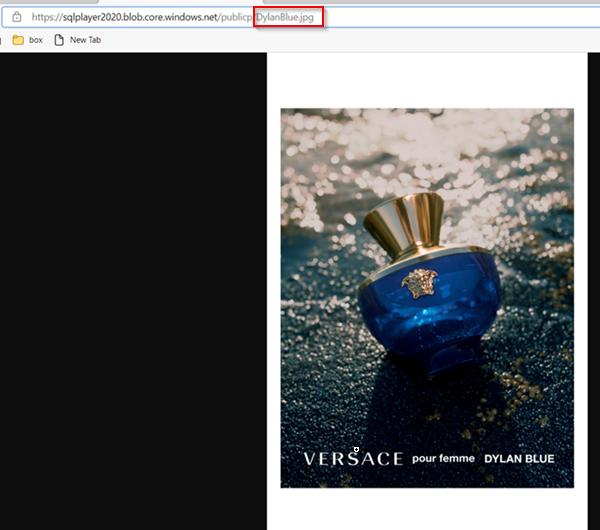
Versace Dylan Blue uploaded photo
So, if we now know why we need Azure Blob Storage for storing photos, it will be great to show in simple steps how to use these photos in an Excel table.
Filling up links to images in Excel file
After I copied the main URL link to Azure Blob Storage, we gonna change only the last part of the link with the name of a photo, which we want to include in our table in Excel. The file must be in photo format (png or jpg), otherwise, Power Apps won’t be able to show it correctly.
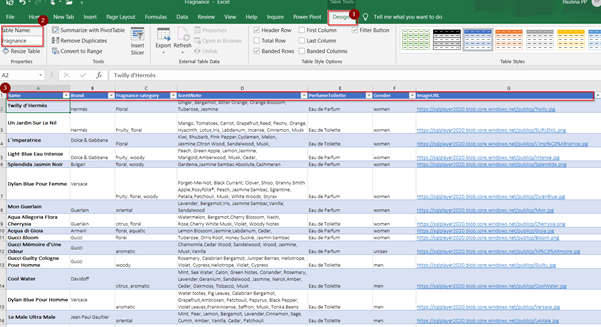
When we rename a URL, we should copy the link to Excel Table, one by one.

Table in Excel
Now, we have a table with all the perfume photos from Azure Blob Storage.
Before we import this spreadsheet to Power Apps where we will be creating our apps, we must convert [1] data (range of cells) into a Table with headers. Let’s name the table “Fragrance” [2]. PowerApps will be connecting through this name. The last thing we must do – is to save the file. I called it “Fragrance.xlsx”.
Configure table in Excel
Meanwhile in Power Apps
Last but not least, when finishing the design Excel table, we want to import the data to our Power Apps.
We log in to PowerApps: https://powerapps.microsoft.com/, where we will create a New App.
After login, I choose Canvas Apps from Blank:
Blank Canvas – Power Apps
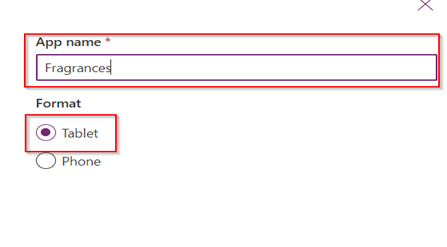
After this, I’ve named my new app – Fragrances and I choose the Tablet layout.
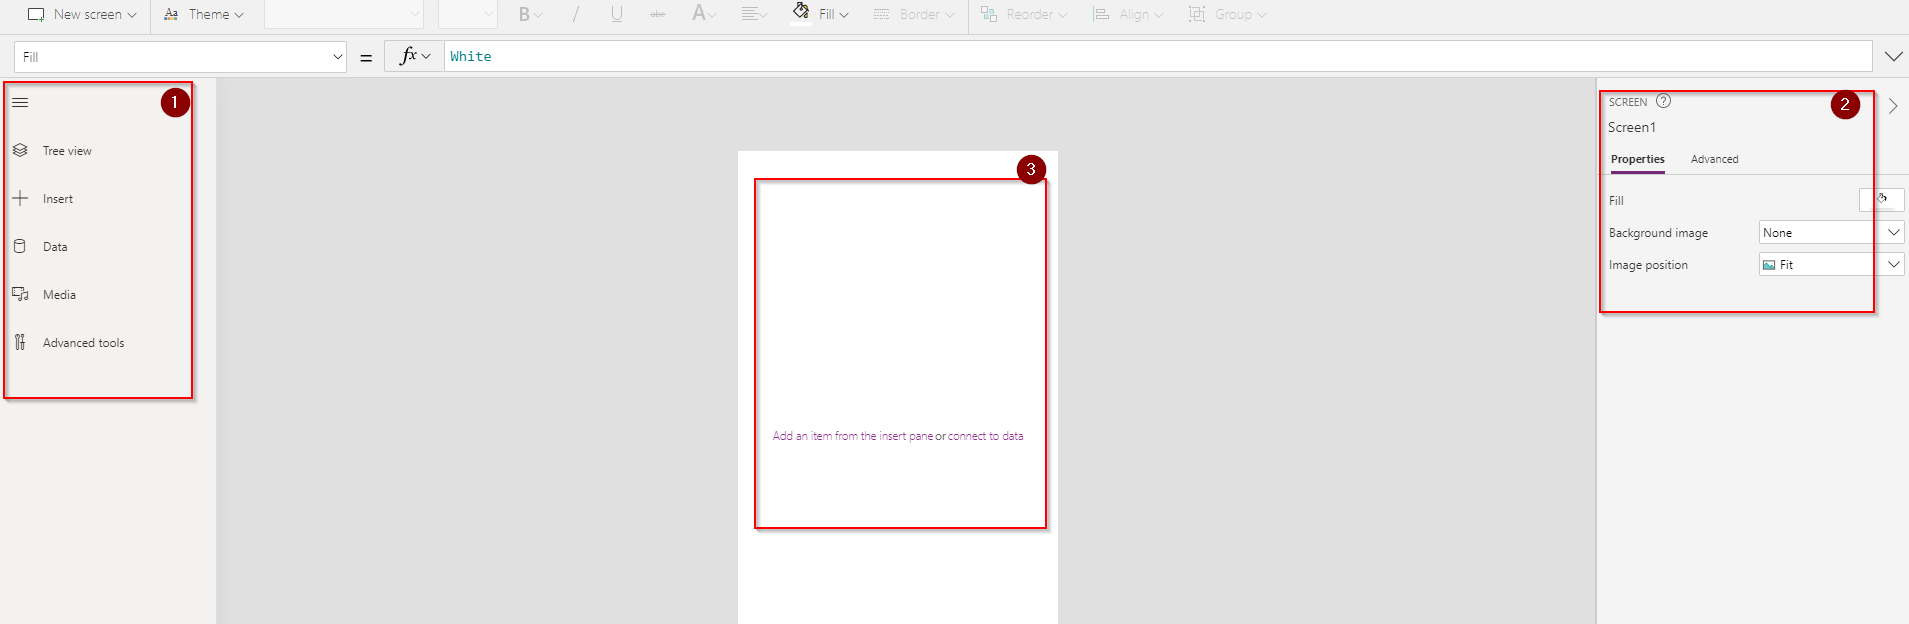
When Power Apps opened an environment we can see a simple interface where we can design a new app.
Canvas interface in Power Apps
- Left pane: Tree View – presents a hierarchical view of all the controls on each screen;
- Right pane: includes layout, properties, data sources;
- Middle pane: designing page, showing your canvas app;
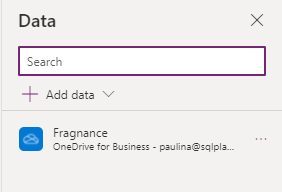
Before we started creating a new app, we must load data into Power Apps. On the Tree View click Data [pane 1], after that Add Data [picture below – number 2] – in this example search OneDrive for Business, because I used this service to store my Excel file.

Adding OneDrive for Business data source.
When you click on the connection item on the list, in the next step, Onedrive will return all Excel files stored there. Find and choose the preferred Excel file.
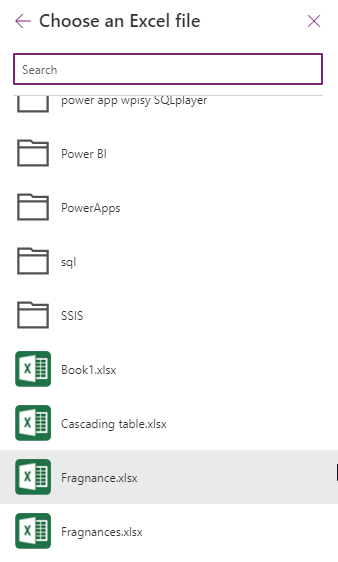
Choose the Excel file with the table
You will see all tables in the selected Excel file – only what you should do here is to select the appropriate table to be added to your Power Apps and click Connect. At the moment Excel data source is available in your app.
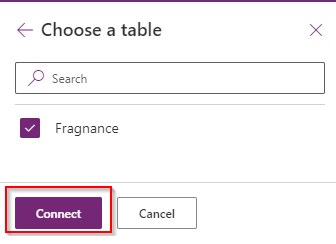
Choosing the table from an Excel file
Your Excel table is ready to use as a data source in Power Apps. (Now we need to configure components from Excel file with our app and photo.)
The connection is ready to use
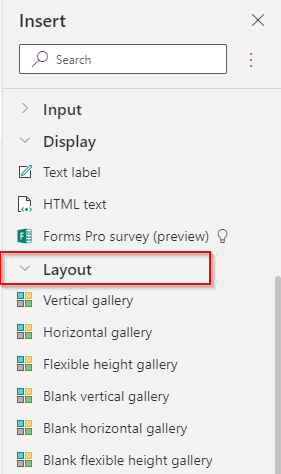
When the table is added to Power Apps we must insert the gallery component from the layout section to display the data from the table.
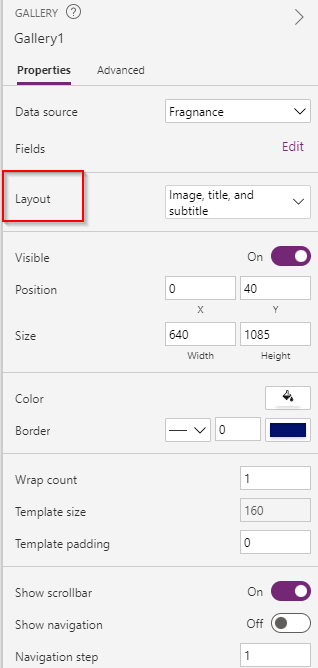
You can change the layout at any time by selecting value from Layout property, as shown on the picture below:
When you choose a preferable gallery it will look like this on your canvas. The application encourages you to select a data source because only in that way this component makes sense.
![]()
After that, when the layout is applied, we can edit Fields. Fields in this case are equivalent to the column in the table, they are represented by a row in the table and contain a data item for each row. Fields can contain different data types (Whole Number, Time, Data), Multiline Text. You can change the order of the fields – select one field and move it up or down.
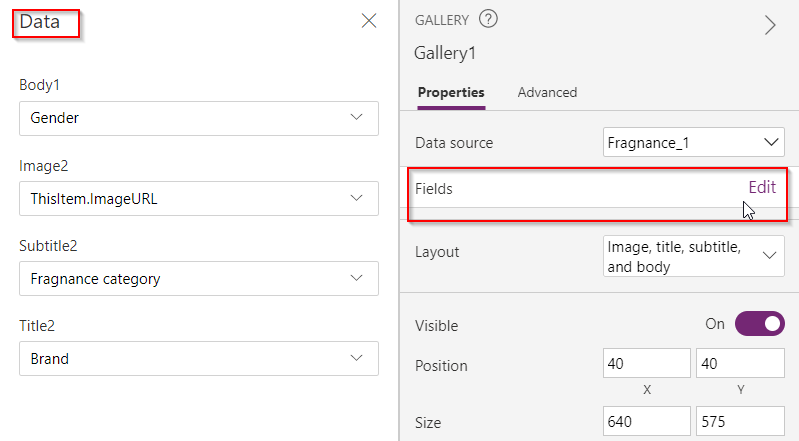
Edit fields – changing their orders
Now Fields and styles are applied. In the first place, I had a perfume brand name, perfume name, and which fragrance group it belongs to.
Configure picture to be shown
In this section, we configure Items on the list of Apps Gallery to display photos from Blob Storage.
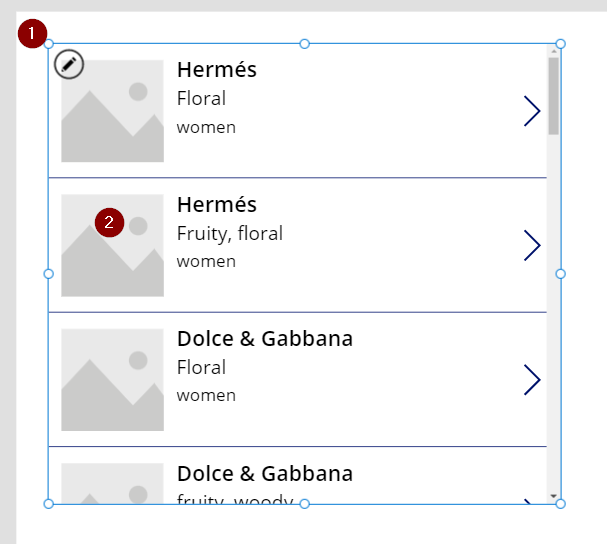
Select the component and click edit icon [1] to be able to configure an Item in the gallery. Then click on one of the photos [2] and on the formula bar select the Image instead of Items, and write this formula: ThisItem.Images.

All photos should automatically be updated in the app.
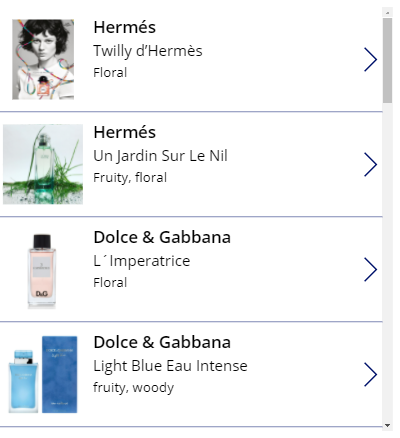
Photos displayed in the gallery component
For better loading files with images be sure:
- that the total of your photos don’t exceed 200MB
- any files images can’t be bigger than 64 MB
- Power Apps supports the following photo types: .jpg, .png, .gif
Now we only need to save this app, publish or share it.
That’s it. In a simple way, we added Excel Table to Microsoft PowerApps, where the photos were located in Azure Blob Storage. Azure Blob Storage is widely used to keep your binary data.
About author

You might also like

Last Weeks Reading (2024-01-28)
📰 News Fabric end-to-end use case: Data Engineering part 2 – Pipelines If you’re new in Microsoft Fabric – check this series and build it with Sam. Set up Azure

Last week reading (2018-02-25)
It’s was very busy and pleasant week for me. Tenth SQLBits which has taken in London this year finished yesterday. I have been working as a volunteer (one of the
Cloud Formations – A New MVP Led Training Initiative
Hello, data friends! Let me spread a few words about the new MVP led training initiative started by my friend and fellow MVP – Paul Andrew. It’s called Cloud Formations
Leave a Reply


1 Comment
Displaying Blob Storage-Based Images in Power Apps – Curated SQL
September 28, 12:10[…] Paulina Nowinska has a tutorial for us: […]